Saturday, October 24, 2015

Mushrooms and foraging

"There are two spiritual dangers in not owning a farm. One is the danger of supposing that breakfast comes from the grocery, and the other that heat comes from a furnace. To avoid the first danger, one should plant a garden, preferably where there is no grocer to confuse the issue." Aldo Leopold, Sand County Almanac
Part of this year has been spent getting to know the hidden treasures found on the farm, mushrooms.  We experienced the thrill of foraging mushrooms and learning not only the delectable edible ones but how to forage these unique gifts from nature.  In years past we always discussed how we should learn to forage mushrooms as we could see them all over the property! Despite the abundance of mushrooms we, or more appropriately me, were apprehensive of picking and eating mushrooms we did not know.  To aid us in gaining knowledge of the mycological edibles, we first enlisted a good chef friend of ours, who foraged mushrooms on a regular basis for his restaurant in Madison, Osteria Papavero.  Chef Francesco Mangano became our guide into the woods and assisting in learning the mushrooms varieties found on the farm. He was careful to point out the ones he knew about and quick to point out the ones he did not know.  Along with Francesco, we purchased two books the “The National Audubon Society Field Guide to Mushrooms” and “Mushroom with Confidence” by Alexander Schwab. The first book proved to be the most useful as it not only offered visuals for comparison with the mushrooms it also contained important information about the mushrooms. Francesco also suggested we join the Upper Midwest USA Mushroom IdentificationGroup on Facebook.  This proved to be invaluable!  We would take pictures of the mushrooms in the environment where we located the mushrooms, and take pictures of the mushrooms on the top and underneath; post the pictures on their Facebook page and within a short period of time we would get an identification response!  
Chick of the Woods 

Aborted Entoloma

The satisfying results of foraging are not just about finding the mushrooms and having the opportunity to cook these delectable treats.  Walking the land and looking around you and exploring the many different contours of the land and catching the glimpse of the wildlife found on the farm can be exhilarating in itself.  When you are foraging you have to look up, down and underneath and around trees, bushes and logs, sometimes you may even brush away leaves to find the growing population of mushrooms.  In one incident, we walked into the woods around dusk and as we made our approach into the woods you could hear turkeys roosting in the trees suddenly deciding they did not like being near us and take flight to the next tree.  We are not talking about 1 or 2 turkeys, no more like 10 or more! Another time we were walking and Sara came across a red coral looking mushroom, it was located in amongst a pile of leaves; it truly was a thing of beauty! I took a picture of the mushroom in its environment and made sure to get all angles of the growth including where we located the mushroom. I posted it on the Facebook page and within a short time we learned it was a Chick of the Woods or Laetiporus sulphureus.  Later I cooked this wonderful mushroom with roast beets, roast pears, roast parsnips and onion cream.  Sara immediately discovered why its name, Chick of the Woods, was indeed because it had the texture of chicken! The flavor was like no other mushroom I have eaten, truly earthy but in such a nice way. 
On another occasion, I had gone down to our summer campsite to take care of our tent and as I walked over to our tent I was looking down and all around me were mushrooms! They had popped up over the last few days and I immediately recognized them as Aborted Entoloma! The work on the tent was put off as I started gathering as many as I could and get them into a bag for dinner the next night! To be sure I posted the pictures of where I found them on the Facebook page and reviewed the field guide.  I was correct in my findings they indeed were the aborted entolomas! For these, I washed them off and sliced them to be sautéed with potato gnocchi.  The flavor was not the same as the chick of the woods but still tasty. They were much milder than the chick of the woods and the next time I prepare them I will look at both drying them first and grating them after they are dry.  I have done this with other mushrooms in the past and find that the dried mushroom ends up having a much more pronounced flavor.
Roast root vegetables, pears and chick of the woods mushrooms

Potato gnocchi and Entoloma mushrooms

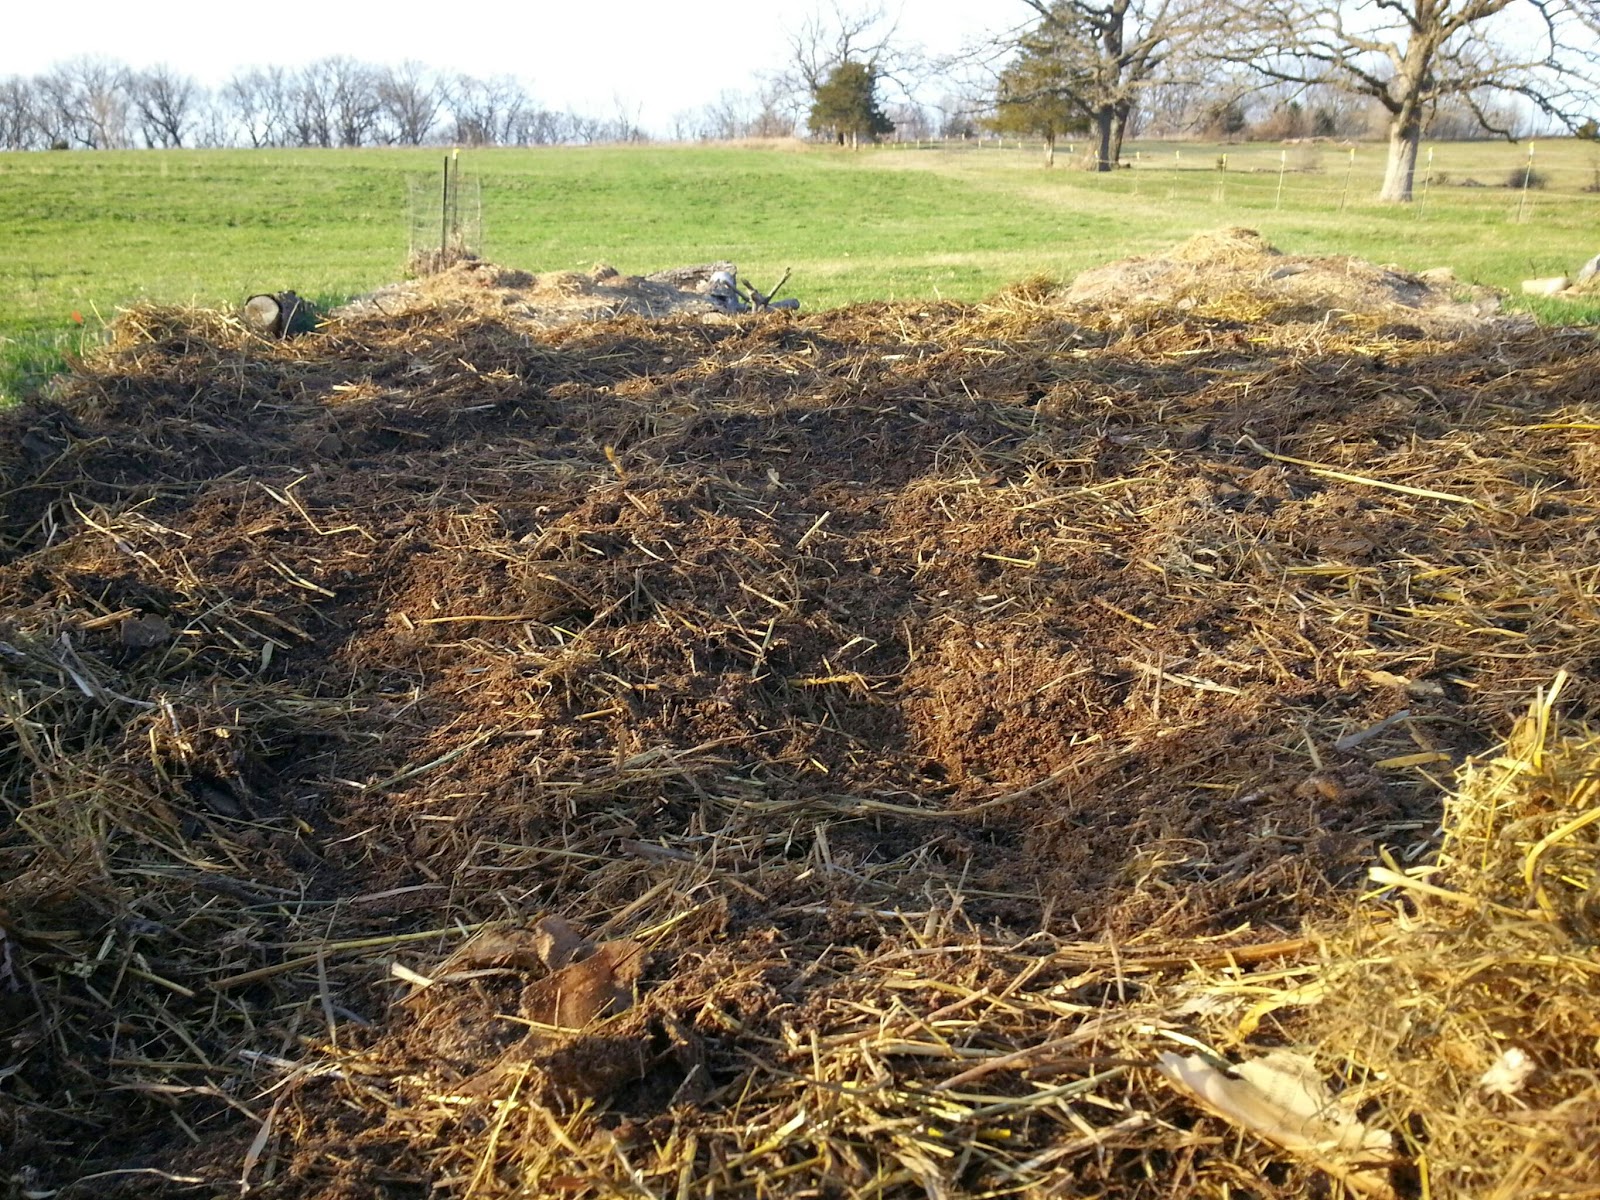
Our garden fared well this year and we were able to harvest beets, carrots, leeks, parsnips, and mustard!  I cut back on growing vegetables in all six beds this year as we did not think we would need as much from the garden. This did two things, first I planted a cover crop, mustard and mustard is a great green manure; when it reaches a certain height you cut it down, cover it and it will decompose into the soil thus creating a great source of nitrogen and the second great beneficiary is eating the mustard because you end up with a great deal of it even when you cover the crop! From late July thru the harvest time we were eating leeks, carrots and beets as I worked on thinning out the crops.  All in all, I believe we ended up with at least 50 pounds of carrots, 25 pounds of beets and 10 pounds of parsnips. The leeks fared well and we ended up with about 3 dozen leeks.  Around mid-August, I planted more leeks and my plan will be to harvest them in the spring.  I heavily mulched the bed and in fact covered the young leeks.  We will see if they make it through the winter.  I also planted garlic this fall in one of the beds we did not grow vegetables; garlic is something I use a lot in my cooking and so I felt it was time to have some garlic. I talked with another farmer friend of mine from Garden to Be Scott Williams about obtaining the garlic for planting and he had a source! Thanks to Scott I was able to get the garlic and we discussed planting the garlic and any tips he might have to assist me in my planting. The plan with garlic is to snip the garlic scapes when they come up in the spring (they are tasty by themselves) and this will allow the plant to focus its energy on producing the garlic bulb. These are generally harvested in late June.  I am anxious to see the outcome of both the garlic bed and the leek bed.
The harvest from the garden
Leek bed ready to go through the winter

Recipes:
Roast beets, parsnips, pears, onion cream and chick of the woods
Yield: serves 4
Ingredients
4 medium sized beets
4 medium sized parsnips
4 pears
1 leek
1 whole unpeeled white onion
Chick of the woods mushrooms
2 tablespoons of sunflower oil
½ cup of Olive oil
¼ cup of Lemon juice
To taste Salt and pepper
1 tablespoon of brown sugar
½ cup of honey
¼ cup of white wine vinegar
Method:
1.       Wash the root vegetables thoroughly and dry them off. Place them in a heavy pan with a couple of tablespoons of olive oil and sprinkle with salt and pepper. Roast them in the oven at 375 degrees until they are tender.  The parsnips may finish cooking before the beets; just remove them while continuing to cook the beets. Remove from the oven and set aside to cool enough to handle them. Using paper towel or towel that you don’t mind turning bright red, rub off the peeling from the roast beet. Slice the root end off of the beets and the top end off; quarter the beet for serving. Cut the parsnips into smaller pieces.  Set aside to combine with other ingredients in an area where you can keep them warm.
2.       Cut the tops off of the pears and cut the bottoms off the pears. Place in a pan with a tablespoon of olive oil and sprinkle brown sugar on each pear. Roast at the same time you are roasting the beets and other root vegetables. When they are tender cut wedges off the pears and remove the core. Slice the wedges into ½ inch wedges and keep warm.
3.       Place the whole onion in a heavy-bottomed pan, skin and all, into the oven with a tablespoon of olive oil. Roast until tender. When tender remove the onion from the oven and simply squeeze out the inner part of the onion from the skin. Cut the bottom off of the onion and puree it in a blender with the remaining olive oil and lemon juice. Season with salt and pepper.
4.       Slice and wash the chick of the woods mushrooms and look for any tiny twigs, leaves etc. that the mushroom may have grown around.  Dry the mushrooms and in a sauté pan add the sunflower oil and heat the oil to just before smoking.  Slice and wash the leeks while the oil is heating up and add to the hot oil along with the sliced mushrooms.  Cook the mushrooms over medium heat until they start to get crispy and most of the water has evaporated from the mushroom.
5.       Combine the roasted root vegetables with the pears and add the honey and vinegar and mix together.
6.       Place all of the ingredients into a bowl and drizzle some of the onion cream around the bowl and serve.
Gnocchi sauteing in clarified butter

Entoloma and Potato Gnocchi
Yield: 20 dozen small gnocchi
Ingredients
2 pounds russet potatoes
1 ¼ cup all-purpose flour
3 large egg yolks
2 tablespoons kosher salt
1/4 cup of clarified butter
Sauce
½ pound of diced tomato
¼ cup of olive oil
1 tablespoon of chop garlic
1 tablespoon of chop shallots
¼ cup balsamic vinegar
1 tablespoon of minced chives
Salt and pepper to taste
Entolomas
¼ pound of Entoloma mushrooms
3 tablespoons of sunflower oil
1 tablespoon chopped shallots
½ tablespoon chopped garlic
1 tablespoon chopped parsley
½ cup dry white wine

Method:
  1. In an oven preheated to 350 degrees bake the potatoes for one hour or until they are tender.  Scoop out the potatoes into a ricer and place on a board or counter.  Make a well in the center. Place a layer of about a ½ cup of flour in the well, add the egg yolks, and then add about ½ cup more flour and the salt. Use a dough scraper to chop the potatoes into the flour and eggs. Do this quickly to prevent the dough from being overworked.  Add more flour as necessary. The resulting dough should be homogeneous and barely sticky on the outside. Shape the dough into a ball. Roll the ball of dough lightly in flour. 
  2. Pull off a section of dough and roll into a long tube that is about a ½ inch thick. Cut into ½ inch pieces. Take gnocchi one at a time and using a lightly floured gnocchi paddle push the gnocchi onto the paddle and roll it down the paddle onto a floured surface.  It is best to test the first gnocchi off the paddle for seasoning and durability. Bring a pot of heavily salted water to a boil and when you have the first gnocchi completed drop into the boiling salted water. The gnocchi is finished when it floats to the top. Test the flavor and if it has not exploded in the water it is good to go. Once the all of the gnocchi have been blanched in the salted water remove them to toweling and lay them out to cool completely. Do not stack the gnocchi when you remove them from the water or you will smash them!  You can freeze them at this stage or use immediately.
  3. In a medium size sauce pot add the olive oil, chop garlic, and chop shallots and heat together for a few seconds. Add the diced tomato and cook together covered until all of the tomatoes have broken down into a liquid. Add the balsamic vinegar and remove the cover and cook to a sauce consistency. Finish with salt and pepper and minced chives.
  4. Wash the entolomas and slice them. Sauté the sliced mushrooms in about 2 tablespoons of sunflower oil with the garlic and shallots. They should be somewhat crispy when you are finished sautéing them.  When they have reached a nice brown color add the white wine and set aside.
  5. In another sauté pan add clarified butter and let it heat up over medium heat. Add the blanched gnocchi and sauté in the butter until they are lightly browned. Remove the gnocchi from the pan and add the mushrooms.  Toss the finished gnocchi with the sauce and sprinkle grated Parmesan cheese over the top with a little extra virgin olive oil and serve.


Thursday, August 20, 2015

Compost and planting leeks for the winter

After one year of composting food scraps from our house, we now have rich organic material to add to our garden. We planted leeks today to harvest after the first hard frost. If we don't harvest them we are going to mulch them heavily for a late spring harvest. 
Looking into the inside of our composting barrel; you can find the barrel in one of my previous post.
The compost came from all of our food scraps in the house, with the exception of meat products. The barrel has not been emptied for one year. I was amazed at how we kept filling it and as nature did its thing and broke down the matter there was always room for more. In addition when I went fishing and came home with extra worms I would throw them in the compost. Finally I want to point out that at no time did the compost smell unpleasant. 
I planted this bed on August 20th; depending on our first hard freeze I am going to try and harvest it in November. Leeks are hardy and as the weather gets colder I will increase the mulch up around the leeks.  I have been told I could cover them over the winter and harvest them in the warm spring. I will do this if the leeks are not big enough in November. This bed was planted with mustard for most of the summer; I cut the mustard and worked it into the soil prior to planting. If you look closely you will see the awesome compost on the rows! 

Thursday, August 13, 2015

Peeling a farm fresh hard boiled egg


Farm fresh eggs are great to eat but when cooking the eggs for deviled eggs or hard boiled eggs they can be a "devil" to peel.  The reason for this bedeviling task is what makes the farm fresh egg superior; between the shell and egg white is a thin membrane that protects the inner egg from outside bacteria. I have tried many methods to peel the shell without ripping away the cooked egg white. One method involves puncturing a pin hole at the bottom of the egg, this does two things 1. The pin hole releases the sulphur from the yolks, while cooking, thus keeping the yolk bright yellow. 2. Allows water to get into the egg and helping to release the membrane from the egg white. While this method worked somewhat successfully I have come up with a much easier method.

Before we get to my ease of peeling your farm fresh egg here is some interesting facts on eating farm fresh, pasture raised hens. Mother Earth News conducted a study on farm fresh eggs vs. store bought eggs and they concluded,Eggs from hens allowed to peck on pasture are a heck of a lot better than those from chickens raised in cages! Most of the eggs currently sold in supermarkets are nutritionally inferior to eggs produced by hens raised on pasture. That’s the conclusion we have reached following completion of the 2007 Mother Earth News egg testing project. Our testing has found that, compared to official U.S. Department of Agriculture (USDA) nutrient data for commercial eggs, eggs from hens raised on pasture may contain:  1⁄3 less cholesterol, 1⁄4 less saturated fat, 2⁄3 more vitamin A, 2 times more omega-3 fatty acids, 3 times more vitamin E, 7 times more beta carotene, 4 to 6 times as much vitamin D” Information provided by Mother Earth News
Now for my new method to peel the hard cooked egg; a method that makes the most sense! Sometimes my inner Chef should stop and review the tape and stop over thinking how I am doing a task and get back to the basics! The process is to simply crack the egg  and under running cold water, gently press on the shell, while turning the egg, continue to do this until the shell rubs free. The video demonstrates how I peel the egg under cold running water. Note I am pushing on the shell very gently as I turn the egg under the running water. 
When I cook my hard boiled eggs I put them in a pot with enough water to cover the eggs, and place a lid on the pot. I bring them to a boil, shut off the heat and let them sit covered for ten minutes. I drain the hot water after ten minutes and run cold water on them until they are cool. Now I can peel them with my fool proof method! 

Friday, August 7, 2015

Canning the Pickles

Canning food has a long history in our country dating back to 1858 when John L. Mason created the square glass jar with a screw on lid and tops with a rubber coating.  The ability to store vegetables, fruit and other seasonal foods made it possible to transport food by pioneers or store food for the winter. 
There really is no fallible method in the canning process; this is why it is imperative to understand the process prior to undertaking your own canning.  Each step in the process can be problematic if not followed correctly and could be fatal to those you love if you are not careful.  With that stated I am sharing how we can at our house but would encourage you to research and create a complete understanding of the process prior to undertaking.  I have read a lot of material regarding the canning process and often I will read "how my grandmother canned and no one became ill due to her canning methods."  The problem with a statement like this is the unknown illnesses from those days; food poisoning was always going on but more than likely it was misinterpreted as the flu or other sickness.  I am a huge fan of growing food, preserving the harvest and eliminating highly processed foods from our cupboards.  In order to be successful at maintaining the ability to do this we need to combine old world ideas with modern knowledge.  Taking those early methods and understanding the science behind them will greatly improve the safety and provide nutritious food for your family. 
Canning food and which foods to can, are important to me as it will greatly impact the product when I go to cook later.  For most of my vegetables I prefer to freeze them; the nutrient content does not lessen as much as it would if I canned the vegetables.  In the case of pickles you need to can them if you are going to have that crunch, and zippy flavor.  Pickles do not freeze well, lol!

Our canning process for our pickles
We use a pressure cooker for canning

Create a new brine for the pickles and sanitize the lids in boiling water. See my previous post for the brine recipe. When making the new brine omit the salt! Remember we brined the pickles first and pickled them in a crock with salt! 

Bring the water up to a boil to sanitize the jars


Slice the larger ones in half
Match up the size of the cucumbers

The jars are filled with new brine and pickles and ready for canning. We left a 1/2 inch head space for the vacuum to work in the jars.

Our pickles were pressurized at 15 lbs of pressure and the process starts when the button on the front pops up; they are pressurized for fifteen minutes once that button pops up


Pickles removed from pressure cooker. It is very important you read how to release the pressure in pressure cooker and follow those instructions. For us it was to allow the pressure to release gradually after removing from heat; we knew it was released when the button popped back down.

We ended up with 11 quarts of pickles!
"Preserving evokes deep-rooted, almost primeval feelings of self-sufficiency and survival, gatherer and hunter, for this is how our ancestors stayed alive. " The River Cottage Preserves Handbook, by Pam Corbin

The above quote comes from one of my favorite books related to preservation of food. Pam writes a unique book on preserving foods, many of which are not commonly found in books here in the states. 
Hugh Fearnley-Whittingstall writes the introduction in Pam's book describing how he first heard of Pam, "...of first hearing of "Pam the Jam" when she was running Thursday Cottage Preserves, a small commercial company that operated in an almost domestic way, making old-fashioned preserves the old fashion way, with real ingredients. I knew she was the perfect person for the job.", you can learn more of Hugh at https://www.rivercottage.net/hugh-fearnley-whittingstall

There are many other books available for reading on how to preserve and in doing the research you are sure to come across some really interesting ideas for your own home canning. Our pickle recipe for example was derived from two very old Polish cookbooks and I believe the outcome of our pickles were definitely the same as if you walked into an old fashioned store with the barrel of pickles!   


Thursday, August 6, 2015

Old Fashioned Polish Crock Pickles

Fermentation
What is fermentation?
Process by which microorganisms converts sugar into another substance in the absence of oxygen
Fermentation comes from the Latin word fevere, meaning to boil. The ancient Romans, upon seeing vats of grapes spontaneously bubble and transform into wine, described the process using the closest analogue they could think of. The process was not actually boiling, the gas from the yeast produced enzymes transformed the sugars in the grapes into alcohol, thus it appeared to be boiling.
Lactic acid bacteria

Rod and sphere shaped bacteria that are present on the skins of fruits, vegetables and humans.
Used for their ability to convert sugar into lactic acid and used in producing pickles, kimchi, and other lacto-fermented products. Because of the lactic acid they are able to tolerate low-pH environments. They are salt-tolerant and thrive in anaerobic environments.

Pickling
A great pickle has a good amount of crunch with the right amount of sour! Pickles are a lacto ferment and one of the easiest fermented foods to prepare.  If you want to pickle something just remember a 2% solution of salt to the total weight of the product you are going to pickle. To figure that out just use a bakers percentage, the main product is your 100% or in this case cucumbers.
Crock Pickles
Approximately 1 pound of grape leaves
Fresh Dill leaves, stems or seeds
3 ounces pickling spice
12 pounds of freshly picked cucumbers (they should be fairly equaled in size and medium in size). The best cucumbers are all green, bumpy and have no yellow on them.
Pickling Solution
2 gallons of cold water (water should be from a well or free of chlorine and other additives you could use distilled water)
1 pint of distilled vinegar
5.12 ounces of canning salt 
Method:
1.       In a 4 gallon crock with a lid, place a layer of grape leaves, one of the fresh dill leaves, stems and or seeds. Scatter 1 ounce of pickling spices on grape leaves and dill. Fill with evenly sized cucumbers half way up the crock. Repeat with grape leaves, dill and pickling spices and add more cucumbers up to the last 2 to 3 inches from the top.  Repeat with grape leaves, dill, and spices.
2.       Combine water, vinegar and salt and mix together thoroughly. Pour over cucumbers and place a non-metallic weight on top to keep cucumbers from floating above the brine.  If you are using a stone do not use limestone.
3.       If the temperature is kept at 86 degrees Fahrenheit the fermentation will be complete within 2 weeks (if cooler, fermentation will take longer).
4.       Pickles should become dark green, but should not be slimy. At the end of the curing, the pickles may be canned in sterilized jars. Strain the pickling liquid and add fresh dill, and grape leaves to the liquid and pour into the jars with the pickles prior to canning. 


Cucumbers coming out of brine after 3 weeks

Ready for canning

Saturday, August 1, 2015

UW Health at The American Center Community Open House Culinary Demonstration

On Sunday UW Health at The American Center, their new health care and wellness facility on Madison's east side hosted an open house to the public.  As a part of the open house chefs from the Madison community were asked to come in and do a fifteen to twenty minute demonstration featuring healthy ethnic styled foods.    The featured chefs and restaurants were Bunky's Cafe Teresa Pullara, and her husband, Rachid Ouabel, Chef Patrick DePula from Salvatore's Restaurant, Chef Kevin McGuinnis from Madison College and myself.  The center features a brand new demonstration kitchen to be used to educate the community on the benefits of healthy eating, and at the same time assist patients who may have to change their own personal eating habits due to their current health.   UW hospital has opened two demonstration kitchens in the Madison area, the other being on the west side of Madison.  The significance of this for Madison College will be in our networking with UW and connecting our future demonstration kitchen with UW’s.  The open house featured some key athletes; legendary Donald Driver of the Green Bay Packers and recent star of UW basketball Sam Decker. Thus the open house was packed and of course filled with folks wanting to meet and maybe get an autograph! I am sure having the two stars on site helped us but we did have standing room only for our presentations!

For my demonstration I only needed to head up to our garden and have a look at what was growing in abundance. Our carrots and beets this year are exploding and we have been thinning them out over the last couple of weeks.  Normally I will harvest my root vegetables after the first frost; I cover them with hay when the weather starts to chill and a frost is coming. When we get that first frost we will go out and harvest all of our root vegetables. The sugar content in the root vegetables will increase exponentially and thus we end up with sweeter flavors. We have done this in years past and I can tell you of times we were being snowed and rained on while we worked into the night pulling up those tasty vegetables!  When I cook our root vegetables I prefer to roast them in the oven; roasting will caramelize the sugar in the root vegetables creating a great flavor profile.  For my demonstration I choose to Spanish Pinchos. They are similar to Spanish Tapas but have their own twist on tasty appetizer portions; you can order several different types, like Tapas but usually they are in the form of a type of sandwich or served with a bread component.  Typically you will find some kind of omelet or something prepared with cod.
Our fresh beets and carrots
Map of the Basque region
The Basque region of the world sits in two countries, Spain and France; the people of the Basque region are rich in culture and history. The region spans about 100 miles from Bilbao, Spain to Bayonne, France. Politically the Basque have undergone much, and yet despite the efforts of Franco, to wipe their culture from the maps of Spain, they are still a thriving community of people.  An interesting part of their language is that it is the only language in the world that does not have a similar dialect anywhere else in the world! During the Franco era the Basque were forbidden to speak their language and because of that there are older generations who do not know their language and yet it is the younger generation who speaks the language; this is definitely unique in the world of language as most often the language is lost when it comes to a younger generation. 

Fresh fish Pincho
While traveling in Northern Spain, Basque Country, I learned of Pinchos or Pintxo; they are found in Pincho bars in the Basque country.  At the time we were traveling with students and others in the Northern Spain region specifically for the Basque cuisine.  The trip was quite memorable and of course the food and wine were nothing short of spectacular! One of the fascinating aspects of the Pincho bar is the wine; when you order you simply ask for blanco vino or tinto vino or white wine or red wine.  The server behind the bar pulls one or the other from the wall of wines on the shelf and pours your selection. There is no sommelier or specific winery from which they make the selection; in fact you have no idea where the wine was produced! I can honestly state I did not have a single bad glass of wine! Each bar has a chef who has developed the menu of different pinchos offered and in fact there is a competition held in the Northern region to find who has the best dish for that year. We dined at one of the winners for the 2009 competition.  The bars will keep track of how many pinchos, what kind of pinchos consumed by the number and size of tooth picks left behind after you have eaten your pinchos.  I should state this was clearly not always the case when we dined but on some occasions the toothpick count was happening. 
Spanish award winning Pincho Chef; they earn the hat he is wearing in this photo when they win! 


The Pincho I choose to create follows in the recipe below. Feel free to ask any questions regarding the recipe and hopefully I can assist you! I will post a picture of my pincho later in another blog; the video did not really do it justice when I finished preparing. 

This is the recipe for my dish:
Grilled Beets, Roast Carrots, Pimento Aioli, Seared Chicken Breast Pincho
Yield: 4 Pinchos

1 Medium Red beet roasted in olive oil, salt and pepper and peeled
1 Medium Carrot roasted in olive oil with salt and pepper
1/8 cup Honey (used for seasoning the vegetables)
½ cup Olive oil (used for vegetables, bread and searing chicken)
¼ cup White wine vinegar (used for seasoning vegetables)
¼ cup Pimento puree (you can purchase canned pimentos for the puree)
½ cup Aioli (see recipe)
1 cup Brine (for chicken breast) see recipe
1 - 4 to 6 ounce skinless Chicken breast
4 Slices crusty French bread (use a good quality French bread for this)
To taste salt and pepper
1 tablespoon minced chives
4 Small beet greens the smaller ones are the best as they are tender.
4 Long sandwich skewers (skewers should be able to go through all of the items on the pincho)

Method:
1.            Slice Beets into 4 slices and brush with olive oil, honey and white wine vinegar. Places beets on a very hot grill and mark both sides quickly being careful to not burn the honey. Season with Salt and pepper.
2.            Slice roast carrot into 4 even slices, lengthwise. Brush with honey and white wine vinegar. Season with salt and pepper.
3.            Brine the chicken breast for about 1 hour. Remove from the brine and pat dry. Season lightly with salt and pepper and sear the chicken breast in 2 tablespoons of olive oil. Finish in the oven until the chicken is completely cooked.  Let the chicken breast rest and slice into 4 equal slices.
4.            Rub sliced crusty French bread with olive oil and lightly brown each slice in the oven.
5.            Whisk in pimento puree to the aioli.
6.            Brush pimento aioli on each slice of bread and layer first with beets, carrots, small beet greens, and sliced chicken breast. Using a squeeze bottle squeeze bottle drizzle aioli on to each pincho and sprinkle with minced chives. Skewer with a large sandwich pick and serve. 
Brine
Yield:  1 cup

½ cup kosher salt
¾ cup Water
½ cup Ice
1 tablespoon Honey
1 Sprig Fresh thyme
1 Sprig Fresh Italian Parsley
1 Bay leaf

Method:
1.            Combine salt and water and bring to a boil. Add ice and chill. Mix in honey and add herbs. Chill completely before using.
Aioli
Yield: 1 pint

1 Egg yolk
1 teaspoon Garlic mashed to a paste (1 toe of garlic will work)
½ ounce white wine vinegar
¼ ounce Water
½ teaspoon Dijon vinegar
1 cup vegetable oil
5 ounces Extra-virgin olive oil
To taste kosher salt
To taste Pepper
1 Tablespoon Lemon juice

Method:
1.            Combine egg yolk, garlic, vinegar, water and mustard. Whisk them to together and slowly whisk in the vegetable oil at a very slow stream to form the emulsion. Continue adding the oil slowly; when finished with the vegetable oil continue with the olive oil. When finished it should be the consistency of mayonnaise. Season with salt, pepper and lemon juice and chill immediately.
Note on roasting vegetables
Wash the outside of the vegetables thoroughly before roasting. Try to have equal sized vegetables for roasting as they will vary in their cooking times.  Beets tend to take a long time to roast; I like to season them and wrap them in aluminum foil when roasting. This does two things, one it keeps the flavor of the beets contained to the beets and does not dry out and two it assist in the cooking time of the beets. I usually roast my vegetables at 375 degrees Fahrenheit.  You can also roast them with some aromatics; using fresh herbs for example will offer a nice additional flavor.


Friday, July 17, 2015

Grapevines third year

These are a couple of pictures of our grapevines after three years. We are going to start putting up the wire trellis in the few weeks.

Wednesday, May 6, 2015

Sandhill Crane taking flight

I just wanted to share this picture I took on the farm yesterday.  Magnificent bird in flight!

Monday, April 20, 2015

How to build a raised bed and grow food in your backyard

How to build the raised garden bed for your home Part 1


We were fortunate to have access to woods and timber for building our raised beds but if you don’t have that kind of access here is an idea for building your own. 
http://www.gazatimber.co.uk/wp-content/uploads/Raised-Beds-Made-Easy.jpg


The above concept is a basic concept that can be built in a day. Note the type of wood used; cedar or redwood will be the best wood for this project. You should not use treated wood, you don’t want the chemicals from the treated wood getting into your tasty vegetables! Something this plan does not show but definitely worth considering, take and place 3 pieces of ½ inch pvc piping on the side of each wall (on the inside), attaching them with 1” galvanized tube straps.  You can place each piece of pvc at a corner and one in the middle on each side.  Having these tubes in your beds will allow you to add a hoop over the bed for extended growing, creating a mini hoop house. The first step before building is to select the area in your yard where you are going to place the raised beds. Select an area that will get optimum sunlight and access to water.  The second important step is preparing the ground where the bed(s) are to be placed. You want the ground underneath to be level and it is advantageous to clear the area of grass or other growing matter.  Contrary to what the above diagram shows; dig 4 holes where you are going to place the beds and instead of having the corner post stick up by 7 ½ inches place the bed with those corner post going into the holes you dug. This will help to secure the bed.  The next step is to gather the soil, compost and other soil building nutrients for your garden; by doing this you will be able to fill your raised bed as soon as it is completed.
Soil
Good soil comes from a variety of ingredients but first and foremost is compost.  Did you know you probably throw away every day a lot of compostable material? Contrary to what most people think; a compost pile does not smell when handled correctly. Even more importantly there are barrels available that turn on wheels and are somewhat sealed up; these are efficient for quickly turning your household waste into great compost!
http://www.homedepot.com/p/Good-Ideas-EZ-Wizard-52-gal-7-0-cu-ft-Hybrid-Composter-with-Rain-Barrel-EZWHGRN/202071533?cm_mmc=Shopping%7cBase&gclid=COz5sMPo_8QCFQwDaQodQSwAUg&gclsrc=aw.ds


The significance of building great nutrients in your soil cannot be stressed enough! The beauty of a raised bed is that those nutrients you are building will not wash away in a heavy rain or in the watering process.
Starting the soil process in the beginning with an empty bed, can be part of the process to having good soil in future growing seasons.  The first layer on the bottom of the bed can be some larger or more difficult items to break down under normal composting conditions. This can be wood from branches off of a tree, or dried leafy material. You want to create layers throughout your soil something like this:
·         Start with cardboard by placing it on top of the wire mesh screen at the bottom of the bed
·         Next lay down some newspaper
·         Next some larger carbon matter such as limbs from branches or woody fibrous material
·         Now if you have access place hay or straw
·         Now add cured, dried manure (if you have access to manure from a local farm make sure it has sat for a year and is dry. Fresh manure is not good to use and aside from being too strong it can present other unsafe problems.  If you cannot be sure, you can create an area in your yard to store the manure, covered tightly and allow it to sit for a year.
·         More hay or straw
·         Soil mixed with compost
·         Finally once the garden is planted add mulch, I like to use hay for my mulch but if you don’t have access use straw.
From this point forward you can now add yearly compost, manure and more mulch. At the end of each growing season you might want to consider a winter cover crop or setup your hoop house and continue your growing during the early cold months. Once it becomes too cold cover the bed completely with mulch.  The importance of adding nutrients to your garden cannot be stressed enough, if you add natural nutrients and stay away from chemicals you will find yourself learning about good soil building and have a further understanding of producing safe food for your family.  Learning about cover crops is another key to adding great nutrients to your raised beds; cover crops can reduce unwanted weeds, manage some pest and provide pollen for those pollinators!  Cover crops give back much needed nitrogen to the soil and assist in the managing of the beds.  Some examples are found in the legumes, like rye, winter wheat, alfalfa and even buckwheat!  
Once you have built your beds and filled them with nutritious soil and other great matter it is time to plant! Think about growing vegetables that your family enjoys and start with what you can manage for eating once they are harvested.  The latter is important as you will need a plan for all of those vegetables as they come to harvest! 
We rent out a house near us and this year we are have asked our tenant if they would like a raised bed garden? They have agreed to the maintenance of having a raised bed garden so we are going to build one or two for them and set them up. I will document our project for my blog and thus you might find yourself wanting to do the same! The upside for them will be fresh veggies for the house and at the same time they will be learning a very important lesson in how to have your own food plot in a small space! 

Thursday, April 16, 2015

Preparing the garden beds

After two years of intensive composting,  mulching and spreading horse and chicken manure the soil is taking on a rich color. When we first put a standard row garden in this part of the property the soil was nothing but Brown sand. Today we have 6 raised beds built out of logs and filled with soil containing brush, and nutrients from the last two years. The importance of this project has been to reduce water usage, heavy mulch and brush hold the water thus using about 50 percent less water, and soil retention,  allowing those nutrients to break down and feed the garden. 
This year we are going to take three of the beds out of production and plant legumes; they will add nitrogen to the soil and will be harvested to feed the chickens.  We will now rotate the beds every year in this manner.
Choregraphing the garden to build better soil requires a little planning but when we do the planning, the results can be incredibly satisfying at the end of the growing season. 

Friday, April 3, 2015

Our first attempt at tapping and cooking down sap for syrup


This year I decided it was time to learn to tap our trees on the farm for syrup. The inspiration for doing this was twofold; the first was from a recent trip to Vermont while visiting family and driving by the many “sugar shacks” and wanting to do the same back home and the second reason was having a local farmer hand me a tap last year to test tapping a box elder tree.  Understanding the type of trees you can tap and how to tap a tree for syrup is an important start. Let’s start with identifying the soft maples:
Bigleaf Maple (Acer macrophyllum) Comparing sizes of a human hand and a bigleaf maple leaf. Photo by Joe Nicholson, Nature photographer, Bugwood.org.


Box Elder (Acer negundo) https://www.extension.iastate.edu/forestry/iowa_trees/trees/boxelder.html


Red Maple (Acer rubrum) http://www.equmed.com/?p=314


Silver Maple (Acer saccharinum) http://www.untamedscience.com/biodiversity/silver-maple/

 http://www.untamedscience.com/biodiversity/silver-maple/
Striped Maple (Acer pensylvanicum) http://www.hubbardbrook.org/image_library/view.php?id=422


The two types of hard maples are the sugar maple (saccharum) and the black maple (nigrum).
Sugar maple compared to the red maple and silver maple. http://uptreeid.com/Species/maples.htm


Black maple http://fineartamerica.com/featured/black-maple-al-bourassa.htmlption


Being a novice at the art of tapping a tree for its sap I needed to do some research on just exactly how does one go about tapping a tree for its sap?  Through several websites I found enough information on what I needed to do and when I needed to start tapping our trees. 

“Generally the sap starts to flow between mid-February and mid-March. The exact time of year depends upon where you live and weather conditions. Sap flows when daytime temperatures rise above freezing (32 degrees Fahrenheit / 0 Celsius) and nighttime temperatures fall below freezing. The rising temperature creates pressure in the tree generating the sap flow. This is basically a transfer of the sap from the tree above the ground and the root system below the ground. The sap generally flows for 4 to 6 weeks, with the best sap produced early on in the sap-flowing season.” http://www.tapmytrees.com/taptree.html


The first tree we tapped was a box elder; the box elder didn’t produce a huge amount of sap but Sara and I both thought the flavor was absolutely tasty! It had butterscotch like flavor and when eaten with pancakes it was, well, to die for!  Unfortunately we did not get a lot of the sap and therefore we did not end up with a lot of syrup.
The next tree we tapped was a nearby silver maple.  Now this tree produced a lot of sap and it is this tree that I shot a number of short videos cooking down the sap.  Our final reduction of sap ended up giving us about 3 quarts of syrup.  Some of the characteristics of the silver maple were light in maple flavor but rich in amber color and despite lacking in the maple flavor it was quite good.  You can view the cooking process by clicking on the link below.

Amber Syrup from our silver maple


To see the video on our first attempt at syrup cooking click on the link below.

https://youtu.be/bxBUGj98nos

The hunt for syrup

Wednesday, February 25, 2015

Sunday, February 15, 2015

Angelic Farm to Table Sweethearts Dinner

Sara and I had an opportunity to attend a Farm-to-Table Cooking Class for Sweethearts on Friday evening. As it turns the event was an awesome experience and we had a lot of fun sharing with three other couples who took advantage of this tasteful culinary excursion.  Every year I am always attempting to come up with an idea of what to do on our anniversary; this year Sara found the perfect plan. She had discovered Angelic Organics on Facebook and saw they were planning a Farm-to-Table cooking class for Sweethearts!

Angelic Organics Learning Center is located in Caledonia, Illinois you can find more information about them at www.learngrowconnect.org The Angelic Organics Learning Center was established in 1999 by Tom Spaulding and John Peterson along with a group of Chicago area residents.  One of the tenets of the learning center is to establish local food systems.  They are communicators of educational opportunities and bring farmers to the table connecting food and farms together with local communities.  They offer experiences to those who may have never been to a farm or have ever understood the connection between what we find on our table and the farms the food comes from.  Part of the education is to connect, partner and develop a local supply of food for many who may not know where to look or how to purchase a CSA, community supported agriculture. 

We are always on the lookout for unique but fun adventures and especially experiences that offer education as part of the evening. The learning center is very special place; it is built out of hay bales, black locust post and other sustainable building materials.  All night long I was eyeing the design of the building and taking mental notes on some of the methods of construction.  The room above has solar panels on the outside and the floor is heated by radiant heat. Keep in mind outside it was a brisk 5 degrees and with a wind chill of minus, FRICKING COLD! The inside was nice and toasty!  Our menu for the evening was Apple-Curry Butternut Squash Soup, Caramelized Onion and Herb Quiche, Cheese and Goat Sausage Quiche, Micro Greens (I believe they were pea shoots) Lemon Vinaigrette Salad. Each of us prepared parts of the menu and while we cooked we spent time getting to know each other.  One of the couples, Sara and I have known for a very long time, Tracy Madison and her husband Fred were also in attendance and thus we together had some interesting intellectual discussions on various topics including books we have read. As far as the cooking, well I tried to hide my background but when you are attending an event like this and one of the couples knows of your culinary background, it becomes difficult to disguise. Besides the second I diced an onion I was exposed! It did not really matter because the learning center is full of great learning material and I seriously was having a blast as prepared our dinner in a great environment!

Walking into the learning center provided us with an introduction to their cattle, Scottish Highland, and watching these mystical like animals forage on their hay was a fun way to start our evening.  One of the animals had his head buried in the feed as he chowed down his locally grown hay! The animals have a long hair coat; at one point in time during the evening they were announced to be hippie steer!  We also walked past their chicken tractor on the way in and did not realize that was what it was until later we learned of it.  I know, we should have known! The farm also raises goats and the meat for quiche came from the goats raised on the farm.  Sara and I are not usually big fans of goat meat; Sara likes to refer to goat meat as to having a goaty flavor! I tend to agree but this meat did not have a strong goat flavor and later on I shared with Sara my thoughts on the meat, I felt it had a sweetness that was pretty good. 
Our cuisine for the evening turned out to be tasty, although we may have over salted the quiche it still was fun and tasty to eat.  The more important part of our adventure and attendance was about having great conversation while preparing a locally grown meal. 

On a side note, once they discovered I was a chef they asked if I might like to come back to assist in preparing their summer Farm-to-Table dinner.  I have to look at the calendar and if it works out and they still want me to help work with other chefs, I might just have to take them up on their offer. 

Featured Post

Eating fresh food from the garden

Fresh foods for me are something of a marvel. The idea of walking out to our garden and picking, pulling or clipping something fresh from ...