Wednesday, May 6, 2015

Sandhill Crane taking flight

I just wanted to share this picture I took on the farm yesterday.  Magnificent bird in flight!

Monday, April 20, 2015

How to build a raised bed and grow food in your backyard

How to build the raised garden bed for your home Part 1


We were fortunate to have access to woods and timber for building our raised beds but if you don’t have that kind of access here is an idea for building your own. 
http://www.gazatimber.co.uk/wp-content/uploads/Raised-Beds-Made-Easy.jpg


The above concept is a basic concept that can be built in a day. Note the type of wood used; cedar or redwood will be the best wood for this project. You should not use treated wood, you don’t want the chemicals from the treated wood getting into your tasty vegetables! Something this plan does not show but definitely worth considering, take and place 3 pieces of ½ inch pvc piping on the side of each wall (on the inside), attaching them with 1” galvanized tube straps.  You can place each piece of pvc at a corner and one in the middle on each side.  Having these tubes in your beds will allow you to add a hoop over the bed for extended growing, creating a mini hoop house. The first step before building is to select the area in your yard where you are going to place the raised beds. Select an area that will get optimum sunlight and access to water.  The second important step is preparing the ground where the bed(s) are to be placed. You want the ground underneath to be level and it is advantageous to clear the area of grass or other growing matter.  Contrary to what the above diagram shows; dig 4 holes where you are going to place the beds and instead of having the corner post stick up by 7 ½ inches place the bed with those corner post going into the holes you dug. This will help to secure the bed.  The next step is to gather the soil, compost and other soil building nutrients for your garden; by doing this you will be able to fill your raised bed as soon as it is completed.
Soil
Good soil comes from a variety of ingredients but first and foremost is compost.  Did you know you probably throw away every day a lot of compostable material? Contrary to what most people think; a compost pile does not smell when handled correctly. Even more importantly there are barrels available that turn on wheels and are somewhat sealed up; these are efficient for quickly turning your household waste into great compost!
http://www.homedepot.com/p/Good-Ideas-EZ-Wizard-52-gal-7-0-cu-ft-Hybrid-Composter-with-Rain-Barrel-EZWHGRN/202071533?cm_mmc=Shopping%7cBase&gclid=COz5sMPo_8QCFQwDaQodQSwAUg&gclsrc=aw.ds


The significance of building great nutrients in your soil cannot be stressed enough! The beauty of a raised bed is that those nutrients you are building will not wash away in a heavy rain or in the watering process.
Starting the soil process in the beginning with an empty bed, can be part of the process to having good soil in future growing seasons.  The first layer on the bottom of the bed can be some larger or more difficult items to break down under normal composting conditions. This can be wood from branches off of a tree, or dried leafy material. You want to create layers throughout your soil something like this:
·         Start with cardboard by placing it on top of the wire mesh screen at the bottom of the bed
·         Next lay down some newspaper
·         Next some larger carbon matter such as limbs from branches or woody fibrous material
·         Now if you have access place hay or straw
·         Now add cured, dried manure (if you have access to manure from a local farm make sure it has sat for a year and is dry. Fresh manure is not good to use and aside from being too strong it can present other unsafe problems.  If you cannot be sure, you can create an area in your yard to store the manure, covered tightly and allow it to sit for a year.
·         More hay or straw
·         Soil mixed with compost
·         Finally once the garden is planted add mulch, I like to use hay for my mulch but if you don’t have access use straw.
From this point forward you can now add yearly compost, manure and more mulch. At the end of each growing season you might want to consider a winter cover crop or setup your hoop house and continue your growing during the early cold months. Once it becomes too cold cover the bed completely with mulch.  The importance of adding nutrients to your garden cannot be stressed enough, if you add natural nutrients and stay away from chemicals you will find yourself learning about good soil building and have a further understanding of producing safe food for your family.  Learning about cover crops is another key to adding great nutrients to your raised beds; cover crops can reduce unwanted weeds, manage some pest and provide pollen for those pollinators!  Cover crops give back much needed nitrogen to the soil and assist in the managing of the beds.  Some examples are found in the legumes, like rye, winter wheat, alfalfa and even buckwheat!  
Once you have built your beds and filled them with nutritious soil and other great matter it is time to plant! Think about growing vegetables that your family enjoys and start with what you can manage for eating once they are harvested.  The latter is important as you will need a plan for all of those vegetables as they come to harvest! 
We rent out a house near us and this year we are have asked our tenant if they would like a raised bed garden? They have agreed to the maintenance of having a raised bed garden so we are going to build one or two for them and set them up. I will document our project for my blog and thus you might find yourself wanting to do the same! The upside for them will be fresh veggies for the house and at the same time they will be learning a very important lesson in how to have your own food plot in a small space! 

Thursday, April 16, 2015

Preparing the garden beds

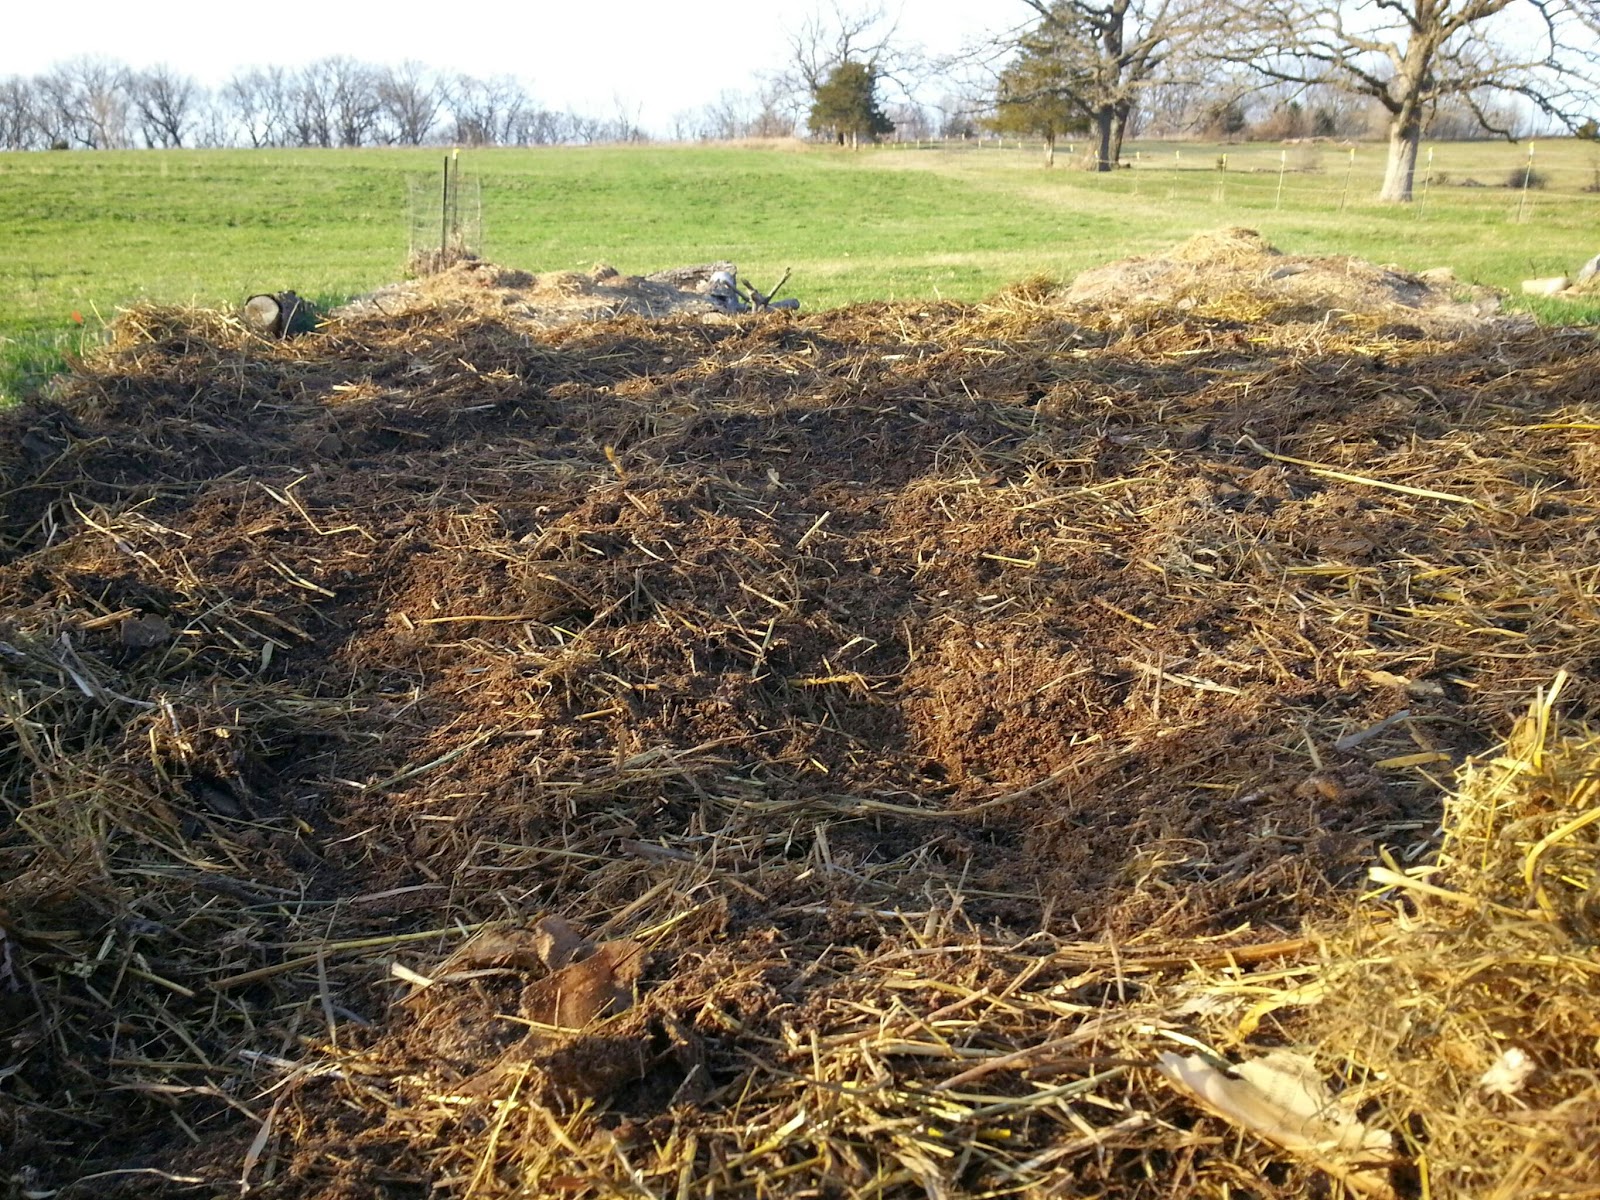
After two years of intensive composting,  mulching and spreading horse and chicken manure the soil is taking on a rich color. When we first put a standard row garden in this part of the property the soil was nothing but Brown sand. Today we have 6 raised beds built out of logs and filled with soil containing brush, and nutrients from the last two years. The importance of this project has been to reduce water usage, heavy mulch and brush hold the water thus using about 50 percent less water, and soil retention,  allowing those nutrients to break down and feed the garden. 
This year we are going to take three of the beds out of production and plant legumes; they will add nitrogen to the soil and will be harvested to feed the chickens.  We will now rotate the beds every year in this manner.
Choregraphing the garden to build better soil requires a little planning but when we do the planning, the results can be incredibly satisfying at the end of the growing season. 

Friday, April 3, 2015

Our first attempt at tapping and cooking down sap for syrup


This year I decided it was time to learn to tap our trees on the farm for syrup. The inspiration for doing this was twofold; the first was from a recent trip to Vermont while visiting family and driving by the many “sugar shacks” and wanting to do the same back home and the second reason was having a local farmer hand me a tap last year to test tapping a box elder tree.  Understanding the type of trees you can tap and how to tap a tree for syrup is an important start. Let’s start with identifying the soft maples:
Bigleaf Maple (Acer macrophyllum) Comparing sizes of a human hand and a bigleaf maple leaf. Photo by Joe Nicholson, Nature photographer, Bugwood.org.


Box Elder (Acer negundo) https://www.extension.iastate.edu/forestry/iowa_trees/trees/boxelder.html


Red Maple (Acer rubrum) http://www.equmed.com/?p=314


Silver Maple (Acer saccharinum) http://www.untamedscience.com/biodiversity/silver-maple/

 http://www.untamedscience.com/biodiversity/silver-maple/
Striped Maple (Acer pensylvanicum) http://www.hubbardbrook.org/image_library/view.php?id=422


The two types of hard maples are the sugar maple (saccharum) and the black maple (nigrum).
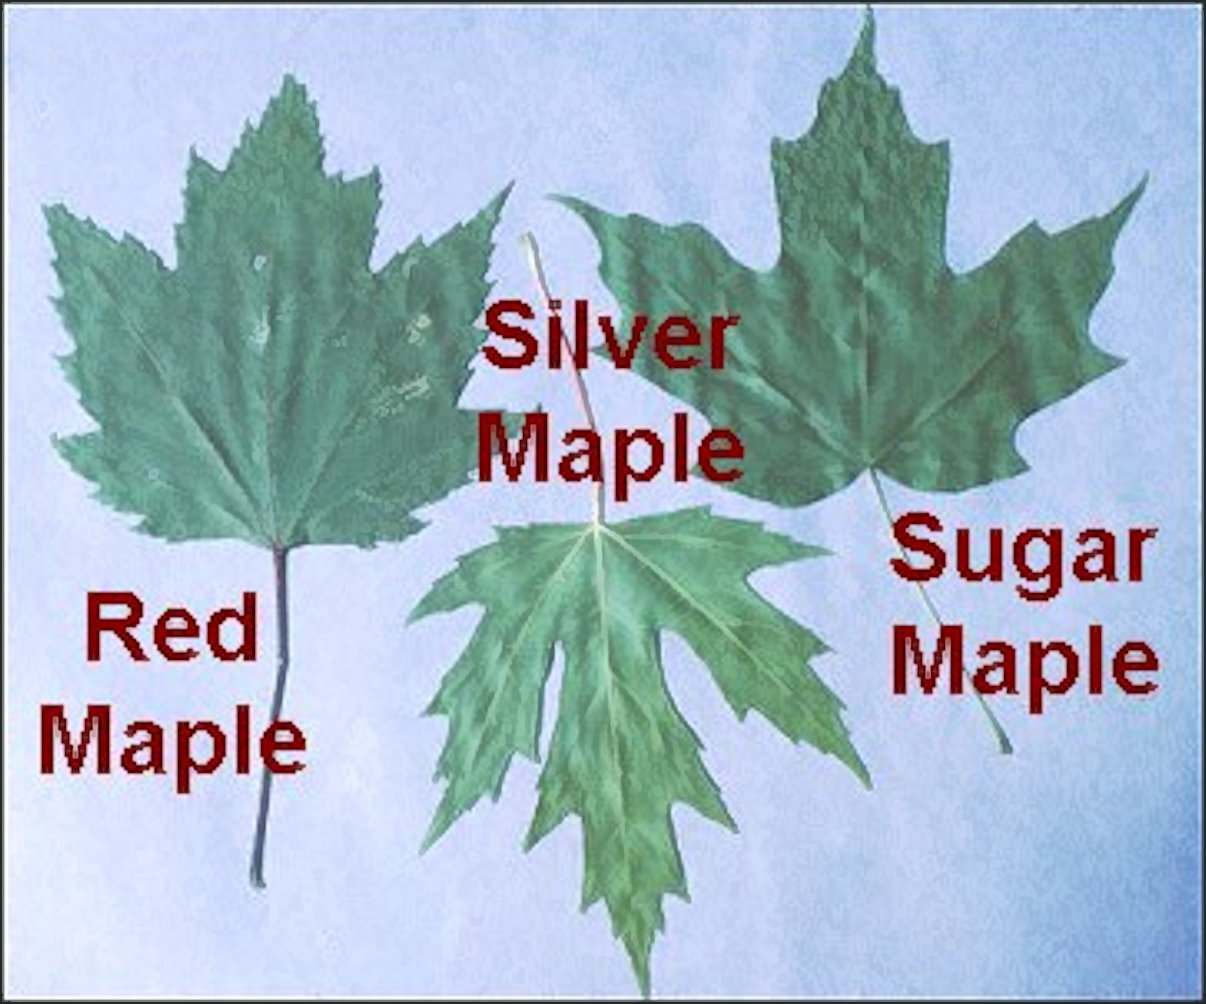
Sugar maple compared to the red maple and silver maple. http://uptreeid.com/Species/maples.htm


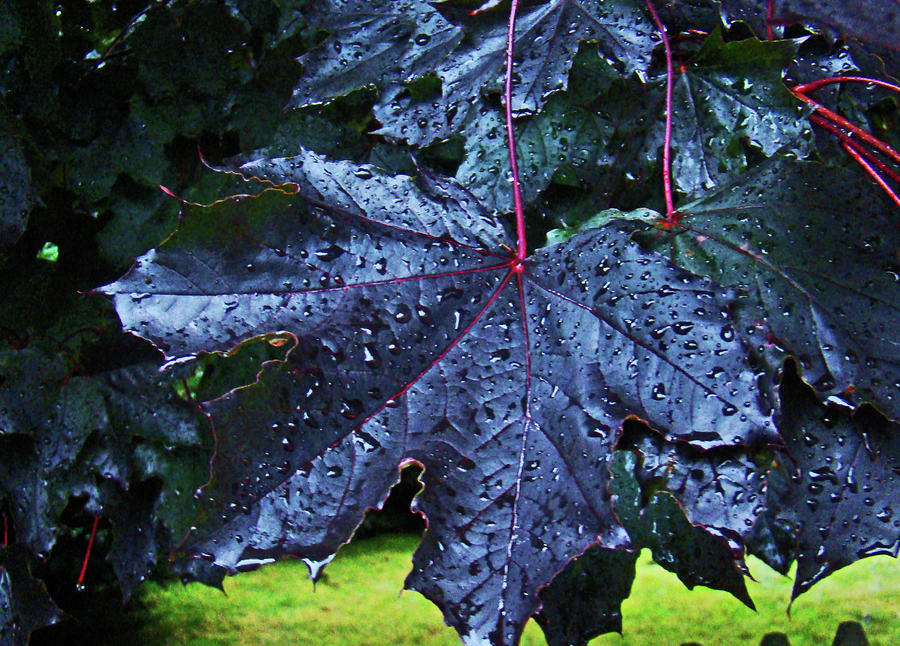
Black maple http://fineartamerica.com/featured/black-maple-al-bourassa.htmlption


Being a novice at the art of tapping a tree for its sap I needed to do some research on just exactly how does one go about tapping a tree for its sap?  Through several websites I found enough information on what I needed to do and when I needed to start tapping our trees. 

“Generally the sap starts to flow between mid-February and mid-March. The exact time of year depends upon where you live and weather conditions. Sap flows when daytime temperatures rise above freezing (32 degrees Fahrenheit / 0 Celsius) and nighttime temperatures fall below freezing. The rising temperature creates pressure in the tree generating the sap flow. This is basically a transfer of the sap from the tree above the ground and the root system below the ground. The sap generally flows for 4 to 6 weeks, with the best sap produced early on in the sap-flowing season.” http://www.tapmytrees.com/taptree.html


The first tree we tapped was a box elder; the box elder didn’t produce a huge amount of sap but Sara and I both thought the flavor was absolutely tasty! It had butterscotch like flavor and when eaten with pancakes it was, well, to die for!  Unfortunately we did not get a lot of the sap and therefore we did not end up with a lot of syrup.
The next tree we tapped was a nearby silver maple.  Now this tree produced a lot of sap and it is this tree that I shot a number of short videos cooking down the sap.  Our final reduction of sap ended up giving us about 3 quarts of syrup.  Some of the characteristics of the silver maple were light in maple flavor but rich in amber color and despite lacking in the maple flavor it was quite good.  You can view the cooking process by clicking on the link below.

Amber Syrup from our silver maple


To see the video on our first attempt at syrup cooking click on the link below.

https://youtu.be/bxBUGj98nos

The hunt for syrup

Wednesday, February 25, 2015

Sunday, February 15, 2015

Angelic Farm to Table Sweethearts Dinner

Sara and I had an opportunity to attend a Farm-to-Table Cooking Class for Sweethearts on Friday evening. As it turns the event was an awesome experience and we had a lot of fun sharing with three other couples who took advantage of this tasteful culinary excursion.  Every year I am always attempting to come up with an idea of what to do on our anniversary; this year Sara found the perfect plan. She had discovered Angelic Organics on Facebook and saw they were planning a Farm-to-Table cooking class for Sweethearts!

Angelic Organics Learning Center is located in Caledonia, Illinois you can find more information about them at www.learngrowconnect.org The Angelic Organics Learning Center was established in 1999 by Tom Spaulding and John Peterson along with a group of Chicago area residents.  One of the tenets of the learning center is to establish local food systems.  They are communicators of educational opportunities and bring farmers to the table connecting food and farms together with local communities.  They offer experiences to those who may have never been to a farm or have ever understood the connection between what we find on our table and the farms the food comes from.  Part of the education is to connect, partner and develop a local supply of food for many who may not know where to look or how to purchase a CSA, community supported agriculture. 

We are always on the lookout for unique but fun adventures and especially experiences that offer education as part of the evening. The learning center is very special place; it is built out of hay bales, black locust post and other sustainable building materials.  All night long I was eyeing the design of the building and taking mental notes on some of the methods of construction.  The room above has solar panels on the outside and the floor is heated by radiant heat. Keep in mind outside it was a brisk 5 degrees and with a wind chill of minus, FRICKING COLD! The inside was nice and toasty!  Our menu for the evening was Apple-Curry Butternut Squash Soup, Caramelized Onion and Herb Quiche, Cheese and Goat Sausage Quiche, Micro Greens (I believe they were pea shoots) Lemon Vinaigrette Salad. Each of us prepared parts of the menu and while we cooked we spent time getting to know each other.  One of the couples, Sara and I have known for a very long time, Tracy Madison and her husband Fred were also in attendance and thus we together had some interesting intellectual discussions on various topics including books we have read. As far as the cooking, well I tried to hide my background but when you are attending an event like this and one of the couples knows of your culinary background, it becomes difficult to disguise. Besides the second I diced an onion I was exposed! It did not really matter because the learning center is full of great learning material and I seriously was having a blast as prepared our dinner in a great environment!

Walking into the learning center provided us with an introduction to their cattle, Scottish Highland, and watching these mystical like animals forage on their hay was a fun way to start our evening.  One of the animals had his head buried in the feed as he chowed down his locally grown hay! The animals have a long hair coat; at one point in time during the evening they were announced to be hippie steer!  We also walked past their chicken tractor on the way in and did not realize that was what it was until later we learned of it.  I know, we should have known! The farm also raises goats and the meat for quiche came from the goats raised on the farm.  Sara and I are not usually big fans of goat meat; Sara likes to refer to goat meat as to having a goaty flavor! I tend to agree but this meat did not have a strong goat flavor and later on I shared with Sara my thoughts on the meat, I felt it had a sweetness that was pretty good. 
Our cuisine for the evening turned out to be tasty, although we may have over salted the quiche it still was fun and tasty to eat.  The more important part of our adventure and attendance was about having great conversation while preparing a locally grown meal. 

On a side note, once they discovered I was a chef they asked if I might like to come back to assist in preparing their summer Farm-to-Table dinner.  I have to look at the calendar and if it works out and they still want me to help work with other chefs, I might just have to take them up on their offer. 

Saturday, January 31, 2015

Video I submitted for a recent award

Here is a video I submitted yesterday for the John & Suanne Roueche Excellence Awards. The video discusses the program for which I am the Program Director. 

http://youtu.be/HjKKXO1lsjQ


Saturday, January 17, 2015

Part 2 of taking the C.E.C. Practical Exam

I completed my C.E.C. exam on January 5th and successfully passed.  After planning and practicing for about three months I packed, repacked and loaded my truck on Friday January 2nd; three days before the actual examine! I am writing about this in my blog for a couple of reasons; I wanted to share the experience to those who have never undergone a culinary practical and for those who are considering it in the future. 
The American Culinary Federation started accessing chefs in this format a number of years ago and when they first rolled out the concept they allowed chefs who have competed and earned a silver or better in the K category to count the competition as a practical exam. A few years later they changed it to an F-1 competition. The K category has the chef fabricating a protein, chosen from a list of proteins required in this category, and prepares 4 entrée portions from the fabricated protein.  For the competition I choose to use lamb; I encased lamb chops with lamb chorizo and earned silver with a 2nd best in show.  I earned my C.E.C. after I completed my written exam and the required courses for this level of certification.  The f-1 is a single person mystery competition where the chef prepared three courses from a mystery basket.  I believe ACF made the change for certification because the f-1 was much closer to the requirements of the practical exam. 
When the notifications came out for the next level for approved culinary evaluators, ACE, I wanted to move to the next level and become a lead ACE.  “Lead Evaluators coach and supervise apprentices and Regional ACE Trainers facilitate trainings and refreshers.” http://www.acfchefs.org/ACF/Certify/ACE/ACEStatus/ACF/Certify/ACE/Status/
One of the caveats for earning this level is all applicants must have taken a practical exam. At first I thought my competition would be okay and I would still be allowed to apply.  This however was not going to be the case! My initial reaction after finding out was a bit of disappointment and disparaging to say the least. The later was due to my already busy schedule and knowing I would now need to find time to practice and plan for taking the CEC exam.  My job as a culinary instructor/program director often will have me assessing my students, and reviewing their skills, and part of what I do, involves getting students to recognize the importance of testing ourselves.  Customers will always be on the lookout for great food, yearning for well-crafted foods and spending their money in our restaurants. When we test ourselves it provides us with valuable insight on what we know and what we do not know.  Over the years I have heard complaints from chefs who feel the test(s) are irrelevant and do not have a realistic cooking environment.  They feel that culinary skills in the restaurants today are significantly different and much of what is being tested is not prepared today in the restaurant industry.  Although they may have a point in the criteria of foods, the types of sauces, or knife cuts currently found on some of today’s popular menus may not be the same as required by the exam; I would argue that the criteria is still about executing sound fundamentals in cooking. Our culinary program, like many others, stresses the fundamentals of cooking; these fundamentals are related to organization, knife skills, heat transfers and sanitation. Within the aforementioned fundamentals there are skills that involve culinary vocabulary, correct technique and developing working systems.  Chefs in general are responsible for a great many aspects of the restaurant and when any part of their restaurant comes to  a halt or slow down due to poor planning, the chef will experience a great deal of grief! The practical exam attempts to have the candidate work under microscope, showcasing each skill as they work. 
The first step towards taking the exam involves research and development; taking ideas for preparation and ensuring they have great flavor profiles, sound techniques and offer a level of skill appropriate to the exam. To do this I reviewed many different texts and notes from my years of experience.  I wanted to add a level of skill that would best represent my culinary skills and showcase what I have learned over the years. To do this I sought out my colleagues and had them review my menu planning.  They too have undergone this type of testing, whether it was in competition or from being part of the testing.  The advice I was seeking came with often times the importance of increasing the skill level. Thus my menu evolved as I added additional skills to each of my plates. 
To be honest I would have or wish I could have devoted more time to the exam and worked in more practice time.  Understanding what a practice means, however is the key, and finding the time needed to get a practice in can be a challenge! Often time’s chefs will fail due to the lack of practice and not realizing the importance of testing their menu and skills prior to taking the actual exam. This is why I wanted to write about the exam; after undergoing the exam it became clear to me the difficulties many candidates face when taking the practical.  I am very fortunate in my job, I work five days a week, I have holidays off and for the most part can fit into my schedule the time to practice.  That doesn’t mean it was easy! The day before my scheduled practice was spent gathering ingredients, measuring them, labeling and checking to make sure I had the equipment on my cart.  This was usually a three hour task in itself and I had help getting together my ingredients and equipment.  I offered students an opportunity to assist me and thus they would be learning how to go about preparing for a practical exam. Not all students thought this would be a great opportunity! I was able to find three who were willing, and believe me I was definitely grateful!  The day of my practice started at 7:30 AM, this was when I would start my day at school, and when I finished my duties as a culinary instructor, I would start my practice at around 4 PM (on a good day). Starting the practice meant setting up the kitchen, storing the mised food, and preparing any last minute prep that I had not finished.  Usually by that time it was closer to 5:00 PM and the test runs 3 hours with fifteen minutes to plate all three courses.  When all of my cooking was completed, plated and tested it was now time to clean up.  By this time you are knee deep in dirty pots, pans and other items, your only thoughts are, “why am I doing this?” For me the answer was more about sharpening my own skills and pushing myself to improve my work habits.  I also wanted my students to know that I too will test myself and stay current in my culinary knowledge.  I believe the latter is why our culinary program is validated and relevant; all of our full time faculty and most of our adjunct faculty have tested themselves in either competition or practical exams.  We have allowed ourselves to be judged by those in our industry who have the knowledge base and skills, which will push us into a better understanding of the material we instruct.  When our students see us undergoing this type of work, they know our test are a direct reflection of professionals and are not based on subjective whims of their instructors.
The other part of getting prepared for a practical is in writing the recipes, prep list, equipment list and photographing the finished plates.  This piece of the exam is an important part; it will be reviewed by the examiners and also be a part of the planning needed to succeed.  My written work was fluid because each week of practice I would make changes to the plan, or recipes as it evolved.  This part is important because I wanted it to be true reflection of what I was doing during the exam. The prep list was changed as I progressed to assist me in completing tasks efficiently and on time. Even after completing the exam, I know the prep list could have and should have been improved further.  Chefs know the importance of having a complete prep list and depend on writing one that will allow them to complete many tasks at the same time.  The prep list is what choreographs our work into a fine tuned operation.
Due to the campus, where I am employed, being closed for the holidays I needed to pack all of my food and equipment two days before the exam and take it home.  I booked a small hotel room near the testing site and the night before drove up to the city where I was to be tested.  The day before at home, with the help of my wife, I double checked all of my ingredients and finished any last minute prep.  Sara, my wife, was an incredible trooper in all of this, as she assisted me and made sure I had everything on my list.  She spent the entire day with me in our small kitchen and helped to make sure I did not miss any details.  I owe her big time for this! Once I had everything packed and loaded I headed out for my hotel. Did I mention it was minus 12 outside! My truck had been winterized but even in this type of weather you never know what to expect.  Once I arrived at my hotel I unloaded my food into my hotel room. I had four coolers, one for my chickens, one for my fish and two for my mised (click on the link to view the work of “mised produce) produce and dry ingredients. The word “mised” is short for misen place, which means everything in its place.   The hotel room had a small refrigerator that I could use for items I needed to stay fresh and safe. The ice machine in the hotel was also put to use as I made sure all of my ingredients were in the “safe zone” for temperature. I plugged my diesel truck into an outlet nearby and felt confident in my getting to the exam on time the next day.   The next morning I woke up and had breakfast in the hotel. I double checked my prep list, reviewed my recipes and again felt confident.  I went back to my hotel room and packed everything. Before loading my truck I wanted to get it started and warmed up. I went outside clicked to unlock the truck and realized the locks were not working! Okay, I thought, no biggie I will unlock it manually.  I got in turned the key to warm the glow plug, shut it off and did it again (in extreme cold it helps to really heat up the glow plug) and turned the ignition. Nothing happened! The battery could not turn the gelled diesel over! It was at this time I also realized I had swallowed a recently implanted crown in the middle of the night as I slept! My hotel neighbor happened to be in his vehicle and I tapped on his window to see if he could give me a jump. He agreed and we tried but that truck was not going to take a charge! Well by this point I am now frantic and extremely concerned on my next move; after all of the planning and practicing was it now going to come down to winter weather and my truck not starting?  I called the test site, explained what had happened and fortunately they sent someone to see if they could help jump my truck or get me to the test site.  After several attempts to jump the truck I gave up and we packed up the car sent to rescue me, and it took two trips to get everything to the campus of the test site! Plus he drove me to a garage, across from my hotel, and I was able to get them to tow my truck to the garage where they would get it started.  Really! This was not the way I wanted my day to start!
Needless to say I was pretty discombobulated by time I had unloaded all my food and equipment! By time I started to setup I felt a dull throb in my mouth from the swallowed broken crown! This day was not going to be a banner day.  Thankfully I had practiced, planned and prepared for this test! In the end it was not a gold medal performance but I had passed with some minor infractions.  Those infractions still haunt me as I write this but I know that under the circumstances it could have been a lot worse. The reviewers liked my food and liked the fact that I had put a very high level of skill into my food.  At one point in time one of them even joked as I was tourneing potatoes, “…are you glutton for punishment!”
My epiphany on doing this exam opened my eyes to a couple of very important facts; one every chef who takes this exam probably has undergone a tremendous amount of work to be there and two they are very passionate about their work.  As an evaluator it is of the utmost importance to give candidates a meaningful experience that will enhance their work and promote skills. This includes those candidates who do not pass; they too have put in some time or have undergone a great deal to be tested.  Some may not have put in the right amount of practice or their practice was not viewed by someone who could have corrected some key mistakes.  No matter the outcome we need to make sure all candidates walk away with a sense of accomplishment and education that will either assist them to continue to succeed or move to the next level.  What we say during the critique must be educational, non-subjective, and understandable.  Our words are significant to the candidate and everything we state will be deployed later on, either in retesting or in their daily work.  It is imperative we can back our statements with facts that ring true to the candidate and makes sense.  Beyond all of that we need to show an incredible amount of respect to the candidate; we have no idea what brought them to test their skill or what that journey was like to get there. 
The last important fact of taking on a test such as this can best be summoned by understanding the rigor of the test and the importance of wanting to prove to ourselves and those we work with, our commitment to excellence. This excellence is driven by ego, work ethic and the drive to be great at what we do.  No matter the reason, our willingness to sharpen our skills and manage our work is an important component to who we are as chefs.  Chefs are driven to please customers, management and instill a work ethic on our staff because we know we are only as good as our last plate of food.


Friday, December 12, 2014

Crafting a Culinary Practical Exam for Success

Focused practice makes for a great practice! LOL!
Culinary craftsmanship doesn't always arrive when we plate our perfectly cooked food. The process to achieving perfection often takes place first on paper as we attempt to write a menu that will balance flavors, enhance the star of the plate and present a colorful, tasty dish. Understanding how each ingredient can bring out the flavor of another and push the profile of the dish into a delectable treat is our goal. 

I have been working on improving my skills as a chef, specifically working on testing my own skills.  In January I will be taking a practical exam for certified executive chef.  I also have previously earned what is called ACE or approved culinary evaluator.  The next level of ACE is to become a lead ACE.  This role would allow me to run ACE exams and gain another level of professional achievement. I have already achieved the status of CEC (certified executive chef) but due to achieving this level of certification through competition I am required to have taken the practical exam.  Those of us who have competed know that competition is actually much more difficult and earning a silver or better can be much tougher! My initial thought when I decided to do this was the benefit it would be to our students; they would see that as an instructor I am willing to humble myself and work on honing my cooking skills. The American Culinary Federation or ACF designates and runs certifications for chefs in our industry.  They are the only organization recognized through the department of labor for certifications in the United States. Once I decided to go through with pushing myself and take on the task of preparing for this exam I realized there was no turning back! 

This blog is the story of what all of this takes and the trials and tribulations of preparing for the test.  The first step was to write my menu and utilize all of the required ingredients for the exam.  The ingredients required for the certified executive chef are:
  • 1 each 10 ounce salmon fillet
  • 2 each 1.25 pound live Maine Lobster
  • 2 whole chickens, 2.5 – 3.5 pounds (fabricate to your menus specifications during the exam)
  • 2 ounces of smoked bacon
  • 1 pound of fresh spinach
  • 2 heads of Boston lettuce
  • 1 piece of Belgian endive
  • 1 pound of carrots
  • 3 each Russet or Yukon potatoes
  • 2 each globe artichokes
  • 2 each Bartlett pears or Granny smith apples
  • 1 pint grape tomatoes
The amounts are only suggested as a guideline for taking the exam; you do not need to use all of the amounts given. The fish course must use both of the seafood items as an appetizer portion.  The salad course is tossed and served with extra dressing on the side.  The main portion is served with two or more accompanying vegetables and starch along with 6 to 7 ounces of protein. I also must use 4 classical vegetable cuts (for example; Julienne, Tournee, Brunoise, Alumette, small dice, Paysanne, and Batonette). I also must use 4 different cooking methods; these could be fry, sauté, roast, boil, poach, steam or grill. Along with those requirements I have to prepare emulsified vinaigrette which has to be completed with a whisk and not with any kind of processor.  The test requires 2 different sauces utilizing different methods; this could be roux based, reduction, or butter.

With those guidelines I set out to write my menu.  For my first course I have chosen to prepare a seared salmon, butter poached lobster, citrus braised endive in a reduction of orange, lavender butter sauce. My salad course is a Boston lettuce, apple cider buttermilk, blue cheese vinaigrette, julienne Granny Smith apple, blue cheese crumble and roast grape tomatoes.  For my main course I have, sautéed chicken breast, chicken thigh and cranberry sausage, artichoke, tournee Yukon gold potato, brunoise carrots, wilted spinach with bacon and supreme sauce.
Salad course: Boston lettuce wrapped in cucumber, Granny Smith Apple, Roast Grape Tomatoes, Apple Cider buttermilk vinaigrette.
The menu has evolved each time I have practiced and worked through some of the details.  Understanding how to cook in an environment that requires specifics can sometimes be daunting as we want to add to our creative menu writing! This means that each time I add an ingredient it is going to dip into my valuable time of completion.  Yes, there is a time limit! I have three hours to complete all three courses and fifteen minutes to plate my food.  Each course is required to have 4 plates for service. A good example of adding to my plate would be my recent change in the sausage recipe; I did not like the first version and developed another version for the sausage.  This was great until I ran the practice last night; my meat grinder was attached to the only mixer available for my practice last night, and unfortunately it was not a great match to my meat grinder! In the middle of stuffing my sausage the grinder came free on the mixer and started to spin on the mixer! Holy forcemeat! I quickly shut it off and fortunately I had enough of the sausage in the casing but I will have to make sure I have the right equipment for the job!
 
Seared salmon, butter poached lobster, citrus braised endive in a reduction of orange, lavender butter sauce
To accomplish all of this a chef needs to practice and at the same time do some research and development of their food.  This is important as we distinguish what is working and what really does not work.  For practice I have written a choreographed plan that includes recipes, equipment list, ingredient list, and finally a prep list.  The final piece is significant as it will assist me in guiding me along in the exam and provide me with some important reminders of what tasks I need to be working on, if I am going to complete the test on time.  The other important factor understands the microscope you will be working under; the evaluator will stand, sit and watch as you perform skill after skill and see if you are in fact ready to achieve the desired level of status.  This also means you need to work neat, safe and maintain the highest level of sanitation throughout the exam.  Your plan should showcase importance of properly storing your food as you prepare it and provide a clean and sanitary environment throughout the exam.  Many chefs have failed this exam due to cross contamination and sadly have to walk away with a fail.  My plan needs to also have in place storage of dirty pans, pots etc. and other non-cooking procedures.  Plating your food for example should show a linear movement that will have your food going from point A to Z.  It should appear as if you have danced this dance enough times that you have no issues in completing.  This would be much the same as working your line in your restaurant; you know exactly where your ingredients are, you can easily prepare multiple plates and remain consistent in their outcome. 
Sautéed chicken breast, chicken thigh and cranberry sausage, artichoke, tournee Yukon gold potato, brunoise carrots, wilted spinach with bacon and supreme sauce.
Thus far I have completed two full runs of my practical and I can honestly tell you I am as tough on myself as I am on my students! At the end of each practice, after cleaning the volumes of dirty pots, pans and plates, I will sit down and review my pictures of my food and make notes of the things I need to change.  For my practices I have recruited students to come in and assist me in my cleanup and/or gather ingredients I may have missed in my initial setup.  They also will add notes to my packet as I work (I will usually ask them to write down something I need to change) and keep me on time by letting me know my time.  I am grateful beyond belief for this help!  During the exam I will not have anyone to assist me in the cleanup nor will I have a time keeper!  Why am I doing this? Oh yea, to show students I am willing to put myself through the same kinds of things I would ask of them.  The last two runs started at around 4:30 PM and with the extra help I have been able to get out of the kitchen by 8:30 PM. Keep in mind my day generally starts at around 7:30 AM at the college.  Not that I am complaining, okay maybe a little venting, but this is really a typical day for a lot of chefs.  I know because that was my schedule for many years and in some cases not only longer hours but everyday! 

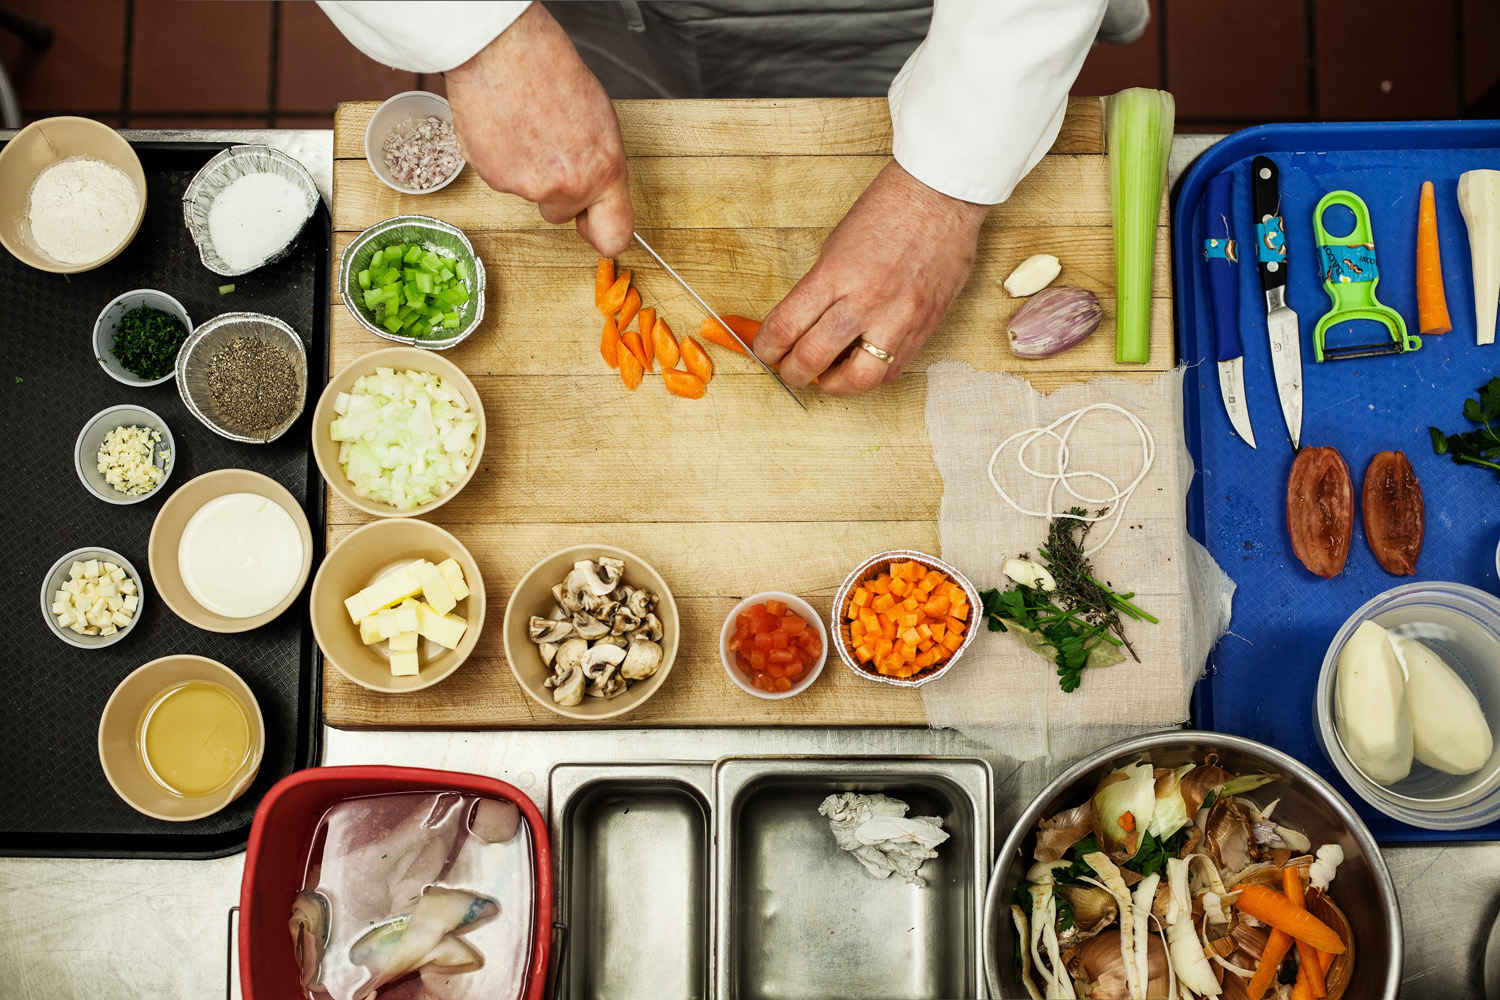
Practice is a two day event; I have to mise  everything out the day before and make sure I have all of my ingredients.  This also includes going through my equipment making sure I have all of the equipment I will need for the test.  Each course is relegated to a specific sheet pan and each ingredient is stored in a reusable container, properly labeled with amount and ingredient.  I am allowed to peel, vegetables, pre-measure ingredients and bring in other items that will enhance my food but not found on the list of required ingredients.  It is amazing how much time it takes to setup for the practice itself and if I do not do a good job of it, the practice is marred by mistakes.  Fortunately it has not been too bad and I seem to be securing my entire product fairly well as my times have been pretty decent. 

There are so many details in taking a test like this that if you do not properly prepare yourself you will not pass.  For me it is not just about passing but doing so at a level that I feel I am at.  The work is something I am used to doing and understand the process.  That doesn't take away the soreness I feel the next day after a full run nor does it address the balance of my everyday work and completing this test.  Yet, there is something fulfilling in doing it, I have a sense of ownership in my work and I am happy to show students I am willing to walk the talk. 
 
Last nights notes and needed changes! 


Tuesday, November 25, 2014

Sharing the knowledge of Turkey Preparation! A Collaboration of ideas with Chef Jonny Hunter, Chef Kevin McGuinnis and Chef Paul Short.

Recently myself and two other chefs, Kevin McGuinnis (culinary instructor Madison College) and Jonny Hunter (Underground food collective), were having a discussion about preparing turkey and some of the various methods being used by chefs in the industry. This discussion involved methods from Thomas Keller and David Arnold's from Cooking Issues website. Chef Kevin was a fan of the Turduckin method; the concept of stuffing a chicken into a duck and stuffing the two birds into a turkey.  The method of stuffing a bird into another bird actually dates back to the Romans and throughout history there have been many variations of this method.  Jonny Hunter was interested in the idea of sous vide turkey; sous vide is a new method of cooking utilizing what is called an immersion circulator. The ciruclator cooks and holds food to an exact temperature and usually the product is in a vacuum sealed bag.  The temperature of the product being cooked is based on the liquid ciruclating around the vacuum sealed bag. The method Jonny wanted to work on involved circulating duck fat through the turkey utilizing the circulator and a series of hoses through the deboned turkey. This is the method that actually spurned our discussion about the various methods chefs will use in preparing their turkey. My method for preparing the turkey fell into a more classical category but not entirely; I wanted to brine my bird, remove the leg and thigh and create a galantine from the leg and thigh; normally  the galantine is served cold and covered in aspic but in this case I planned on serving it warm. The later being more old school in the culinary world. Thomas Keller's brine can be found in his book Bouchon; this is the cook book from his restaurant Bouchon Bistro.
After having this discussion I thought it would be interesting to have the three of us prepare our turkey in the style in which we discussed! The methods we each choose and the recipes can be found here.
Chef Paul Short 
Roast Turkey, and Turkey Galantine
Brine
2 gallons water
2 cup kosher salt
1/4 cup honey
4 whole lemons halved
1 1/2 ounces of fresh thyme sprigs
1 1/2 ounces of Italian parsley 
10 bay leaves
10 peppercorns
20 to 25 lb turkey
Method:

  1. Combine all of the ingredients except the turkey and mix together in a container large enough to hold the turkey and brine. Add the turkey and place a weight on top to keep the turkey submerged completely under the brine. Place turkey soaking in the brine and refrigerate for 24 hours. At the end of the 24 hours, remove the turkey from the brine and wipe off any excess herbs. Place on a wire rack and air dry in the refrigerator for 24 hours. 
  2. Remove the leg and thighs from the turkey and carefully cut the skin away from each. Remove the wings and take as much of the skin off of the wings as you can (use this in the galantine). 
  3. De-bone the leg and thigh meat and cut out any tendons from the leg meat. Dice the leg and thigh meat and place in a freezer to chill completely. 
  4. Roast the wing bones, thigh and leg bones, along with any tendons or meat removed in the deboning process. Prepare a turkey stock from the bones for use in cooking the galantine. 

22 lb turkey in brine for 24 hours
Turkey Galantine 
Forcemeat
24 ounces of pork butt cut into strips
5 ounces of pork fat (fat back)
16 ounces of turkey leg and thigh meat - remove the skin carefully and reserve for use
Aromats
1 medium onion diced
2 sprigs of chopped thyme
2 cups of Maderia Wine
Spice Slurry
1 ounce salt
1/4 teaspoon ground ginger
1 1/2 teaspoon ground white pepper
1/2 cup of Grand Marnier
1/2 cup of Cream Sherry
Orange zest from two oranges
Binder
1 ounce Non fat dry milk solids
4 grams Dextrose
1/4 cup of turkey stock or chicken stock
1 packet of gelatin bloomed with cold stock - heat bloomed gelatin over low heat until the gelatin has completely dissolved.  
Garnish for the Galatine
1/2 cup Chopped dry fruit (such as cranberries, cherries etc.) 

Method:
  1. Grind meats and fats with chilled aromatics through a 1/8 inch plate. Note; it is important to chill all of the grinder parts prior to grinding. 


  1. Combine all of the ingredients in the spice slurry and mix with ground meat over ice.


  1. Add the binder and mix thoroughly with the ground meat. 
  2. Poach a small amount of the meat in water, keeping the water below 200 degrees. Taste the test piece to check for flavor and adjust accordingly. 
  3. Take the reserved skin and carefully cut it so that it can be spread out into one sheet. Lay a piece of cheese cloth on a cutting board, the cheese cloth should be big enough to hold both skins from the two leg and thighs. Carefully spread the skin on to the cheese cloth, attempting to create a complete cover for the forcemeat.  Place this into the freezer to chill for about 20 minutes. 


  1. Soak the dried fruit in a small amount of water, stock or liqueur. Once the dried cherries have been soaked fold them into the forcemeat. 
  2. Spread the forcemeat across the fat; it should be about a half inch thick all the way across. 


  1. Take hold of the cheese cloth closest to you and lift it away from you to roll the galantine up. Once you have it rolled up, place it on to a piece of parchment paper. Using a jelly roll method, fold the paper over the roll and place a straight edge up against the roll push against the roll tightly. take butcher twine and tie off the roll. Secure the ends with butcher twine as well. 
  2. Poach the galantine in the turkey stock prepared earlier, keep the poaching liquid at about 180 degrees. When the internal temperature reaches 165 degrees it is finished. Leave in the poaching liquid and chill overnight. In this case I allowed it to reach room temperature, removed the cheese cloth, and browned it in a hot pan with canola oil and butter. 
  3. For serving the galantine it is best to slice it when you are ready to slice the turkey breast. 
  4.  While the galantine poaching in the stock, truss the breast by tying off the remaining wing bones with the top of the carcass. Place a cast iron pan large enough to hold the turkey breast on high heat and heat the pan. When the pan starts to smoke add the turkey breast (breast side up) into the hot pan and place in the oven. Roast the breast at 350 convection or 400 degrees in a non convection oven. 
  5. When the turkey is removed add some chopped thyme to the fat in the cast iron pan, stir quickly and squeeze fresh lemon juice through a strainer into the fat and stir. Pour this over the finished turkey and allow it to rest.  

Turducken
Kevin McGuinnis
Culinary Arts Instructor, Madison College

1 whole turkey
1 whole duck
4 boneless, skinless chicken breasts
A/N  Activa RM, transglutaminase, aka meat glue
A/N   basic poultry brine


Procedure
1.       Prepare a turkey as for a galantine. See Jacques Pepin’s amazing video demonstration here.

2.       Remove the duck breasts and skin.  Set aside.

3.       Make duck confit out of the leg quarters. (Takes 2 days).  Pull off bone and keep in large pieces.
4.       De-bone chicken.  Set aside.
5.       Using a fine-mesh strainer, sprinkle Activa over turkey breasts in an even layer. Place duck breasts over        turkey breasts.
6.       Sprinkle Activa over duck confit. (0.5%-1.0% should be sufficient).  Stuff into leg cavities.
7.       Sprinkle Activa over duck meat.  Apply the chicken breasts to the duck.8.       Inject brine into the turkey          breasts.

8.       Sew up the back of the bird so that it now resembles a regular turkey.  Place in the refrigerator,                     uncovered, for three days.  The skin will get very dry, which will help it get a very crispy skin later.

9.   Cook on a rack in a low oven (I cooked mine in a Combi oven at 200°F) until the internal temperature          registers 145°F (mine took 3 ½ hours).  Chances are you do not have a Combi oven.  Place a pan half          full of water on the rack underneath the turkey. Remove from oven.  You can chill the bird now or just          let it rest while you heat the oven for crisping the skin.

10.   Heat oven to highest setting.  Place the bird in the oven and crisp the skin.  Depending on your oven, this       could take anywhere from 8-15 minutes.  Alternatively, the turkey could be deep fried to achieve the             crispness you want.

11.   Serve immediately to maximize the crispiness.  With the low heat cooking and re-thermalization, there        is no need for resting.

Note on Activa
Activa RM is the brand name for a natural enzyme, transglutaminase, that bonds proteins to each other.  Chefs commonly refer to it as “meat glue”.  You should use care when working with it.  Always wear latex or vinyl gloves when handling and do not ingest.

Basic Poultry Brine
500 g      water
25 g        salt

For Chef Jonny Hunter, from The Underground Food Collective, I will post the link for his preparation.  He is a busy guy! Jonny promises me he will send us his pictures of his finished bird but for now here is what he did today!
http://www.cookingissues.com/2009/11/25/turkey-time-part-3-how-to-cook-it/

We shot some video today as well and when we have it finished being edited I will post. In the mean time happy holidays and I hope you and your family have a Happy Turkey Day! 

Featured Post

Eating fresh food from the garden

Fresh foods for me are something of a marvel. The idea of walking out to our garden and picking, pulling or clipping something fresh from ...