Saturday, August 1, 2015

UW Health at The American Center Community Open House Culinary Demonstration

On Sunday UW Health at The American Center, their new health care and wellness facility on Madison's east side hosted an open house to the public.  As a part of the open house chefs from the Madison community were asked to come in and do a fifteen to twenty minute demonstration featuring healthy ethnic styled foods.    The featured chefs and restaurants were Bunky's Cafe Teresa Pullara, and her husband, Rachid Ouabel, Chef Patrick DePula from Salvatore's Restaurant, Chef Kevin McGuinnis from Madison College and myself.  The center features a brand new demonstration kitchen to be used to educate the community on the benefits of healthy eating, and at the same time assist patients who may have to change their own personal eating habits due to their current health.   UW hospital has opened two demonstration kitchens in the Madison area, the other being on the west side of Madison.  The significance of this for Madison College will be in our networking with UW and connecting our future demonstration kitchen with UW’s.  The open house featured some key athletes; legendary Donald Driver of the Green Bay Packers and recent star of UW basketball Sam Decker. Thus the open house was packed and of course filled with folks wanting to meet and maybe get an autograph! I am sure having the two stars on site helped us but we did have standing room only for our presentations!

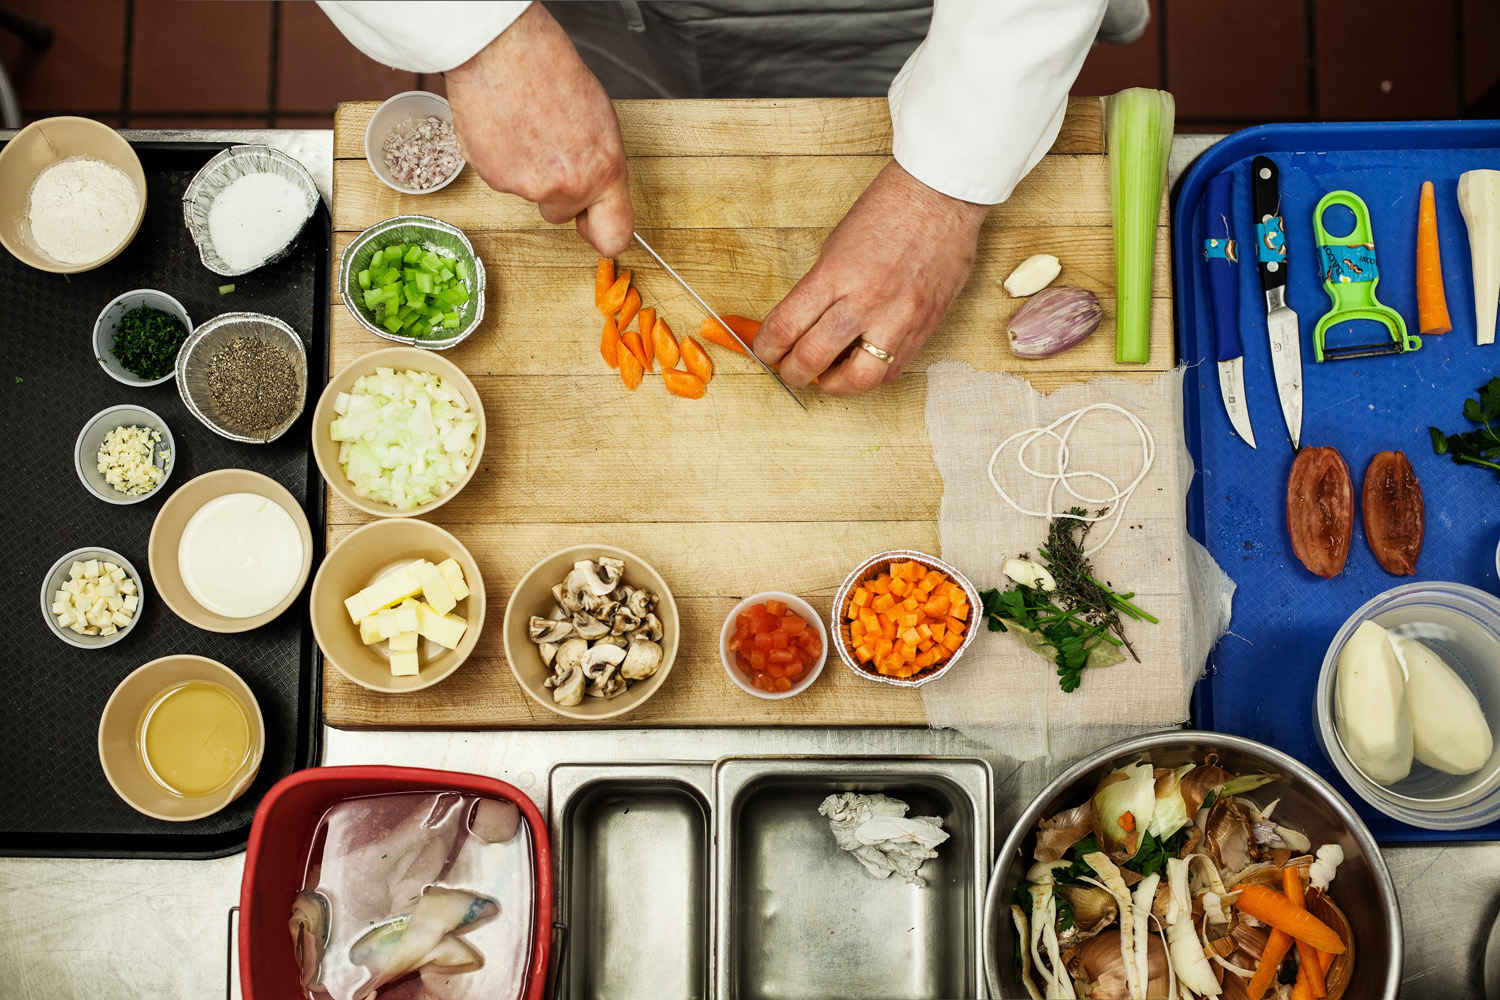
For my demonstration I only needed to head up to our garden and have a look at what was growing in abundance. Our carrots and beets this year are exploding and we have been thinning them out over the last couple of weeks.  Normally I will harvest my root vegetables after the first frost; I cover them with hay when the weather starts to chill and a frost is coming. When we get that first frost we will go out and harvest all of our root vegetables. The sugar content in the root vegetables will increase exponentially and thus we end up with sweeter flavors. We have done this in years past and I can tell you of times we were being snowed and rained on while we worked into the night pulling up those tasty vegetables!  When I cook our root vegetables I prefer to roast them in the oven; roasting will caramelize the sugar in the root vegetables creating a great flavor profile.  For my demonstration I choose to Spanish Pinchos. They are similar to Spanish Tapas but have their own twist on tasty appetizer portions; you can order several different types, like Tapas but usually they are in the form of a type of sandwich or served with a bread component.  Typically you will find some kind of omelet or something prepared with cod.
Our fresh beets and carrots
Map of the Basque region
The Basque region of the world sits in two countries, Spain and France; the people of the Basque region are rich in culture and history. The region spans about 100 miles from Bilbao, Spain to Bayonne, France. Politically the Basque have undergone much, and yet despite the efforts of Franco, to wipe their culture from the maps of Spain, they are still a thriving community of people.  An interesting part of their language is that it is the only language in the world that does not have a similar dialect anywhere else in the world! During the Franco era the Basque were forbidden to speak their language and because of that there are older generations who do not know their language and yet it is the younger generation who speaks the language; this is definitely unique in the world of language as most often the language is lost when it comes to a younger generation. 

Fresh fish Pincho
While traveling in Northern Spain, Basque Country, I learned of Pinchos or Pintxo; they are found in Pincho bars in the Basque country.  At the time we were traveling with students and others in the Northern Spain region specifically for the Basque cuisine.  The trip was quite memorable and of course the food and wine were nothing short of spectacular! One of the fascinating aspects of the Pincho bar is the wine; when you order you simply ask for blanco vino or tinto vino or white wine or red wine.  The server behind the bar pulls one or the other from the wall of wines on the shelf and pours your selection. There is no sommelier or specific winery from which they make the selection; in fact you have no idea where the wine was produced! I can honestly state I did not have a single bad glass of wine! Each bar has a chef who has developed the menu of different pinchos offered and in fact there is a competition held in the Northern region to find who has the best dish for that year. We dined at one of the winners for the 2009 competition.  The bars will keep track of how many pinchos, what kind of pinchos consumed by the number and size of tooth picks left behind after you have eaten your pinchos.  I should state this was clearly not always the case when we dined but on some occasions the toothpick count was happening. 
Spanish award winning Pincho Chef; they earn the hat he is wearing in this photo when they win! 


The Pincho I choose to create follows in the recipe below. Feel free to ask any questions regarding the recipe and hopefully I can assist you! I will post a picture of my pincho later in another blog; the video did not really do it justice when I finished preparing. 

This is the recipe for my dish:
Grilled Beets, Roast Carrots, Pimento Aioli, Seared Chicken Breast Pincho
Yield: 4 Pinchos

1 Medium Red beet roasted in olive oil, salt and pepper and peeled
1 Medium Carrot roasted in olive oil with salt and pepper
1/8 cup Honey (used for seasoning the vegetables)
½ cup Olive oil (used for vegetables, bread and searing chicken)
¼ cup White wine vinegar (used for seasoning vegetables)
¼ cup Pimento puree (you can purchase canned pimentos for the puree)
½ cup Aioli (see recipe)
1 cup Brine (for chicken breast) see recipe
1 - 4 to 6 ounce skinless Chicken breast
4 Slices crusty French bread (use a good quality French bread for this)
To taste salt and pepper
1 tablespoon minced chives
4 Small beet greens the smaller ones are the best as they are tender.
4 Long sandwich skewers (skewers should be able to go through all of the items on the pincho)

Method:
1.            Slice Beets into 4 slices and brush with olive oil, honey and white wine vinegar. Places beets on a very hot grill and mark both sides quickly being careful to not burn the honey. Season with Salt and pepper.
2.            Slice roast carrot into 4 even slices, lengthwise. Brush with honey and white wine vinegar. Season with salt and pepper.
3.            Brine the chicken breast for about 1 hour. Remove from the brine and pat dry. Season lightly with salt and pepper and sear the chicken breast in 2 tablespoons of olive oil. Finish in the oven until the chicken is completely cooked.  Let the chicken breast rest and slice into 4 equal slices.
4.            Rub sliced crusty French bread with olive oil and lightly brown each slice in the oven.
5.            Whisk in pimento puree to the aioli.
6.            Brush pimento aioli on each slice of bread and layer first with beets, carrots, small beet greens, and sliced chicken breast. Using a squeeze bottle squeeze bottle drizzle aioli on to each pincho and sprinkle with minced chives. Skewer with a large sandwich pick and serve. 
Brine
Yield:  1 cup

½ cup kosher salt
¾ cup Water
½ cup Ice
1 tablespoon Honey
1 Sprig Fresh thyme
1 Sprig Fresh Italian Parsley
1 Bay leaf

Method:
1.            Combine salt and water and bring to a boil. Add ice and chill. Mix in honey and add herbs. Chill completely before using.
Aioli
Yield: 1 pint

1 Egg yolk
1 teaspoon Garlic mashed to a paste (1 toe of garlic will work)
½ ounce white wine vinegar
¼ ounce Water
½ teaspoon Dijon vinegar
1 cup vegetable oil
5 ounces Extra-virgin olive oil
To taste kosher salt
To taste Pepper
1 Tablespoon Lemon juice

Method:
1.            Combine egg yolk, garlic, vinegar, water and mustard. Whisk them to together and slowly whisk in the vegetable oil at a very slow stream to form the emulsion. Continue adding the oil slowly; when finished with the vegetable oil continue with the olive oil. When finished it should be the consistency of mayonnaise. Season with salt, pepper and lemon juice and chill immediately.
Note on roasting vegetables
Wash the outside of the vegetables thoroughly before roasting. Try to have equal sized vegetables for roasting as they will vary in their cooking times.  Beets tend to take a long time to roast; I like to season them and wrap them in aluminum foil when roasting. This does two things, one it keeps the flavor of the beets contained to the beets and does not dry out and two it assist in the cooking time of the beets. I usually roast my vegetables at 375 degrees Fahrenheit.  You can also roast them with some aromatics; using fresh herbs for example will offer a nice additional flavor.


Friday, July 17, 2015

Grapevines third year

These are a couple of pictures of our grapevines after three years. We are going to start putting up the wire trellis in the few weeks.

Wednesday, May 6, 2015

Sandhill Crane taking flight

I just wanted to share this picture I took on the farm yesterday.  Magnificent bird in flight!

Monday, April 20, 2015

How to build a raised bed and grow food in your backyard

How to build the raised garden bed for your home Part 1


We were fortunate to have access to woods and timber for building our raised beds but if you don’t have that kind of access here is an idea for building your own. 
http://www.gazatimber.co.uk/wp-content/uploads/Raised-Beds-Made-Easy.jpg


The above concept is a basic concept that can be built in a day. Note the type of wood used; cedar or redwood will be the best wood for this project. You should not use treated wood, you don’t want the chemicals from the treated wood getting into your tasty vegetables! Something this plan does not show but definitely worth considering, take and place 3 pieces of ½ inch pvc piping on the side of each wall (on the inside), attaching them with 1” galvanized tube straps.  You can place each piece of pvc at a corner and one in the middle on each side.  Having these tubes in your beds will allow you to add a hoop over the bed for extended growing, creating a mini hoop house. The first step before building is to select the area in your yard where you are going to place the raised beds. Select an area that will get optimum sunlight and access to water.  The second important step is preparing the ground where the bed(s) are to be placed. You want the ground underneath to be level and it is advantageous to clear the area of grass or other growing matter.  Contrary to what the above diagram shows; dig 4 holes where you are going to place the beds and instead of having the corner post stick up by 7 ½ inches place the bed with those corner post going into the holes you dug. This will help to secure the bed.  The next step is to gather the soil, compost and other soil building nutrients for your garden; by doing this you will be able to fill your raised bed as soon as it is completed.
Soil
Good soil comes from a variety of ingredients but first and foremost is compost.  Did you know you probably throw away every day a lot of compostable material? Contrary to what most people think; a compost pile does not smell when handled correctly. Even more importantly there are barrels available that turn on wheels and are somewhat sealed up; these are efficient for quickly turning your household waste into great compost!
http://www.homedepot.com/p/Good-Ideas-EZ-Wizard-52-gal-7-0-cu-ft-Hybrid-Composter-with-Rain-Barrel-EZWHGRN/202071533?cm_mmc=Shopping%7cBase&gclid=COz5sMPo_8QCFQwDaQodQSwAUg&gclsrc=aw.ds


The significance of building great nutrients in your soil cannot be stressed enough! The beauty of a raised bed is that those nutrients you are building will not wash away in a heavy rain or in the watering process.
Starting the soil process in the beginning with an empty bed, can be part of the process to having good soil in future growing seasons.  The first layer on the bottom of the bed can be some larger or more difficult items to break down under normal composting conditions. This can be wood from branches off of a tree, or dried leafy material. You want to create layers throughout your soil something like this:
·         Start with cardboard by placing it on top of the wire mesh screen at the bottom of the bed
·         Next lay down some newspaper
·         Next some larger carbon matter such as limbs from branches or woody fibrous material
·         Now if you have access place hay or straw
·         Now add cured, dried manure (if you have access to manure from a local farm make sure it has sat for a year and is dry. Fresh manure is not good to use and aside from being too strong it can present other unsafe problems.  If you cannot be sure, you can create an area in your yard to store the manure, covered tightly and allow it to sit for a year.
·         More hay or straw
·         Soil mixed with compost
·         Finally once the garden is planted add mulch, I like to use hay for my mulch but if you don’t have access use straw.
From this point forward you can now add yearly compost, manure and more mulch. At the end of each growing season you might want to consider a winter cover crop or setup your hoop house and continue your growing during the early cold months. Once it becomes too cold cover the bed completely with mulch.  The importance of adding nutrients to your garden cannot be stressed enough, if you add natural nutrients and stay away from chemicals you will find yourself learning about good soil building and have a further understanding of producing safe food for your family.  Learning about cover crops is another key to adding great nutrients to your raised beds; cover crops can reduce unwanted weeds, manage some pest and provide pollen for those pollinators!  Cover crops give back much needed nitrogen to the soil and assist in the managing of the beds.  Some examples are found in the legumes, like rye, winter wheat, alfalfa and even buckwheat!  
Once you have built your beds and filled them with nutritious soil and other great matter it is time to plant! Think about growing vegetables that your family enjoys and start with what you can manage for eating once they are harvested.  The latter is important as you will need a plan for all of those vegetables as they come to harvest! 
We rent out a house near us and this year we are have asked our tenant if they would like a raised bed garden? They have agreed to the maintenance of having a raised bed garden so we are going to build one or two for them and set them up. I will document our project for my blog and thus you might find yourself wanting to do the same! The upside for them will be fresh veggies for the house and at the same time they will be learning a very important lesson in how to have your own food plot in a small space! 

Thursday, April 16, 2015

Preparing the garden beds

After two years of intensive composting,  mulching and spreading horse and chicken manure the soil is taking on a rich color. When we first put a standard row garden in this part of the property the soil was nothing but Brown sand. Today we have 6 raised beds built out of logs and filled with soil containing brush, and nutrients from the last two years. The importance of this project has been to reduce water usage, heavy mulch and brush hold the water thus using about 50 percent less water, and soil retention,  allowing those nutrients to break down and feed the garden. 
This year we are going to take three of the beds out of production and plant legumes; they will add nitrogen to the soil and will be harvested to feed the chickens.  We will now rotate the beds every year in this manner.
Choregraphing the garden to build better soil requires a little planning but when we do the planning, the results can be incredibly satisfying at the end of the growing season. 

Friday, April 3, 2015

Our first attempt at tapping and cooking down sap for syrup


This year I decided it was time to learn to tap our trees on the farm for syrup. The inspiration for doing this was twofold; the first was from a recent trip to Vermont while visiting family and driving by the many “sugar shacks” and wanting to do the same back home and the second reason was having a local farmer hand me a tap last year to test tapping a box elder tree.  Understanding the type of trees you can tap and how to tap a tree for syrup is an important start. Let’s start with identifying the soft maples:
Bigleaf Maple (Acer macrophyllum) Comparing sizes of a human hand and a bigleaf maple leaf. Photo by Joe Nicholson, Nature photographer, Bugwood.org.


Box Elder (Acer negundo) https://www.extension.iastate.edu/forestry/iowa_trees/trees/boxelder.html


Red Maple (Acer rubrum) http://www.equmed.com/?p=314


Silver Maple (Acer saccharinum) http://www.untamedscience.com/biodiversity/silver-maple/

 http://www.untamedscience.com/biodiversity/silver-maple/
Striped Maple (Acer pensylvanicum) http://www.hubbardbrook.org/image_library/view.php?id=422


The two types of hard maples are the sugar maple (saccharum) and the black maple (nigrum).
Sugar maple compared to the red maple and silver maple. http://uptreeid.com/Species/maples.htm


Black maple http://fineartamerica.com/featured/black-maple-al-bourassa.htmlption


Being a novice at the art of tapping a tree for its sap I needed to do some research on just exactly how does one go about tapping a tree for its sap?  Through several websites I found enough information on what I needed to do and when I needed to start tapping our trees. 

“Generally the sap starts to flow between mid-February and mid-March. The exact time of year depends upon where you live and weather conditions. Sap flows when daytime temperatures rise above freezing (32 degrees Fahrenheit / 0 Celsius) and nighttime temperatures fall below freezing. The rising temperature creates pressure in the tree generating the sap flow. This is basically a transfer of the sap from the tree above the ground and the root system below the ground. The sap generally flows for 4 to 6 weeks, with the best sap produced early on in the sap-flowing season.” http://www.tapmytrees.com/taptree.html


The first tree we tapped was a box elder; the box elder didn’t produce a huge amount of sap but Sara and I both thought the flavor was absolutely tasty! It had butterscotch like flavor and when eaten with pancakes it was, well, to die for!  Unfortunately we did not get a lot of the sap and therefore we did not end up with a lot of syrup.
The next tree we tapped was a nearby silver maple.  Now this tree produced a lot of sap and it is this tree that I shot a number of short videos cooking down the sap.  Our final reduction of sap ended up giving us about 3 quarts of syrup.  Some of the characteristics of the silver maple were light in maple flavor but rich in amber color and despite lacking in the maple flavor it was quite good.  You can view the cooking process by clicking on the link below.

Amber Syrup from our silver maple


To see the video on our first attempt at syrup cooking click on the link below.

https://youtu.be/bxBUGj98nos

The hunt for syrup

Wednesday, February 25, 2015

Sunday, February 15, 2015

Angelic Farm to Table Sweethearts Dinner

Sara and I had an opportunity to attend a Farm-to-Table Cooking Class for Sweethearts on Friday evening. As it turns the event was an awesome experience and we had a lot of fun sharing with three other couples who took advantage of this tasteful culinary excursion.  Every year I am always attempting to come up with an idea of what to do on our anniversary; this year Sara found the perfect plan. She had discovered Angelic Organics on Facebook and saw they were planning a Farm-to-Table cooking class for Sweethearts!

Angelic Organics Learning Center is located in Caledonia, Illinois you can find more information about them at www.learngrowconnect.org The Angelic Organics Learning Center was established in 1999 by Tom Spaulding and John Peterson along with a group of Chicago area residents.  One of the tenets of the learning center is to establish local food systems.  They are communicators of educational opportunities and bring farmers to the table connecting food and farms together with local communities.  They offer experiences to those who may have never been to a farm or have ever understood the connection between what we find on our table and the farms the food comes from.  Part of the education is to connect, partner and develop a local supply of food for many who may not know where to look or how to purchase a CSA, community supported agriculture. 

We are always on the lookout for unique but fun adventures and especially experiences that offer education as part of the evening. The learning center is very special place; it is built out of hay bales, black locust post and other sustainable building materials.  All night long I was eyeing the design of the building and taking mental notes on some of the methods of construction.  The room above has solar panels on the outside and the floor is heated by radiant heat. Keep in mind outside it was a brisk 5 degrees and with a wind chill of minus, FRICKING COLD! The inside was nice and toasty!  Our menu for the evening was Apple-Curry Butternut Squash Soup, Caramelized Onion and Herb Quiche, Cheese and Goat Sausage Quiche, Micro Greens (I believe they were pea shoots) Lemon Vinaigrette Salad. Each of us prepared parts of the menu and while we cooked we spent time getting to know each other.  One of the couples, Sara and I have known for a very long time, Tracy Madison and her husband Fred were also in attendance and thus we together had some interesting intellectual discussions on various topics including books we have read. As far as the cooking, well I tried to hide my background but when you are attending an event like this and one of the couples knows of your culinary background, it becomes difficult to disguise. Besides the second I diced an onion I was exposed! It did not really matter because the learning center is full of great learning material and I seriously was having a blast as prepared our dinner in a great environment!

Walking into the learning center provided us with an introduction to their cattle, Scottish Highland, and watching these mystical like animals forage on their hay was a fun way to start our evening.  One of the animals had his head buried in the feed as he chowed down his locally grown hay! The animals have a long hair coat; at one point in time during the evening they were announced to be hippie steer!  We also walked past their chicken tractor on the way in and did not realize that was what it was until later we learned of it.  I know, we should have known! The farm also raises goats and the meat for quiche came from the goats raised on the farm.  Sara and I are not usually big fans of goat meat; Sara likes to refer to goat meat as to having a goaty flavor! I tend to agree but this meat did not have a strong goat flavor and later on I shared with Sara my thoughts on the meat, I felt it had a sweetness that was pretty good. 
Our cuisine for the evening turned out to be tasty, although we may have over salted the quiche it still was fun and tasty to eat.  The more important part of our adventure and attendance was about having great conversation while preparing a locally grown meal. 

On a side note, once they discovered I was a chef they asked if I might like to come back to assist in preparing their summer Farm-to-Table dinner.  I have to look at the calendar and if it works out and they still want me to help work with other chefs, I might just have to take them up on their offer. 

Saturday, January 31, 2015

Video I submitted for a recent award

Here is a video I submitted yesterday for the John & Suanne Roueche Excellence Awards. The video discusses the program for which I am the Program Director. 

http://youtu.be/HjKKXO1lsjQ


Saturday, January 17, 2015

Part 2 of taking the C.E.C. Practical Exam

I completed my C.E.C. exam on January 5th and successfully passed.  After planning and practicing for about three months I packed, repacked and loaded my truck on Friday January 2nd; three days before the actual examine! I am writing about this in my blog for a couple of reasons; I wanted to share the experience to those who have never undergone a culinary practical and for those who are considering it in the future. 
The American Culinary Federation started accessing chefs in this format a number of years ago and when they first rolled out the concept they allowed chefs who have competed and earned a silver or better in the K category to count the competition as a practical exam. A few years later they changed it to an F-1 competition. The K category has the chef fabricating a protein, chosen from a list of proteins required in this category, and prepares 4 entrĂ©e portions from the fabricated protein.  For the competition I choose to use lamb; I encased lamb chops with lamb chorizo and earned silver with a 2nd best in show.  I earned my C.E.C. after I completed my written exam and the required courses for this level of certification.  The f-1 is a single person mystery competition where the chef prepared three courses from a mystery basket.  I believe ACF made the change for certification because the f-1 was much closer to the requirements of the practical exam. 
When the notifications came out for the next level for approved culinary evaluators, ACE, I wanted to move to the next level and become a lead ACE.  “Lead Evaluators coach and supervise apprentices and Regional ACE Trainers facilitate trainings and refreshers.” http://www.acfchefs.org/ACF/Certify/ACE/ACEStatus/ACF/Certify/ACE/Status/
One of the caveats for earning this level is all applicants must have taken a practical exam. At first I thought my competition would be okay and I would still be allowed to apply.  This however was not going to be the case! My initial reaction after finding out was a bit of disappointment and disparaging to say the least. The later was due to my already busy schedule and knowing I would now need to find time to practice and plan for taking the CEC exam.  My job as a culinary instructor/program director often will have me assessing my students, and reviewing their skills, and part of what I do, involves getting students to recognize the importance of testing ourselves.  Customers will always be on the lookout for great food, yearning for well-crafted foods and spending their money in our restaurants. When we test ourselves it provides us with valuable insight on what we know and what we do not know.  Over the years I have heard complaints from chefs who feel the test(s) are irrelevant and do not have a realistic cooking environment.  They feel that culinary skills in the restaurants today are significantly different and much of what is being tested is not prepared today in the restaurant industry.  Although they may have a point in the criteria of foods, the types of sauces, or knife cuts currently found on some of today’s popular menus may not be the same as required by the exam; I would argue that the criteria is still about executing sound fundamentals in cooking. Our culinary program, like many others, stresses the fundamentals of cooking; these fundamentals are related to organization, knife skills, heat transfers and sanitation. Within the aforementioned fundamentals there are skills that involve culinary vocabulary, correct technique and developing working systems.  Chefs in general are responsible for a great many aspects of the restaurant and when any part of their restaurant comes to  a halt or slow down due to poor planning, the chef will experience a great deal of grief! The practical exam attempts to have the candidate work under microscope, showcasing each skill as they work. 
The first step towards taking the exam involves research and development; taking ideas for preparation and ensuring they have great flavor profiles, sound techniques and offer a level of skill appropriate to the exam. To do this I reviewed many different texts and notes from my years of experience.  I wanted to add a level of skill that would best represent my culinary skills and showcase what I have learned over the years. To do this I sought out my colleagues and had them review my menu planning.  They too have undergone this type of testing, whether it was in competition or from being part of the testing.  The advice I was seeking came with often times the importance of increasing the skill level. Thus my menu evolved as I added additional skills to each of my plates. 
To be honest I would have or wish I could have devoted more time to the exam and worked in more practice time.  Understanding what a practice means, however is the key, and finding the time needed to get a practice in can be a challenge! Often time’s chefs will fail due to the lack of practice and not realizing the importance of testing their menu and skills prior to taking the actual exam. This is why I wanted to write about the exam; after undergoing the exam it became clear to me the difficulties many candidates face when taking the practical.  I am very fortunate in my job, I work five days a week, I have holidays off and for the most part can fit into my schedule the time to practice.  That doesn’t mean it was easy! The day before my scheduled practice was spent gathering ingredients, measuring them, labeling and checking to make sure I had the equipment on my cart.  This was usually a three hour task in itself and I had help getting together my ingredients and equipment.  I offered students an opportunity to assist me and thus they would be learning how to go about preparing for a practical exam. Not all students thought this would be a great opportunity! I was able to find three who were willing, and believe me I was definitely grateful!  The day of my practice started at 7:30 AM, this was when I would start my day at school, and when I finished my duties as a culinary instructor, I would start my practice at around 4 PM (on a good day). Starting the practice meant setting up the kitchen, storing the mised food, and preparing any last minute prep that I had not finished.  Usually by that time it was closer to 5:00 PM and the test runs 3 hours with fifteen minutes to plate all three courses.  When all of my cooking was completed, plated and tested it was now time to clean up.  By this time you are knee deep in dirty pots, pans and other items, your only thoughts are, “why am I doing this?” For me the answer was more about sharpening my own skills and pushing myself to improve my work habits.  I also wanted my students to know that I too will test myself and stay current in my culinary knowledge.  I believe the latter is why our culinary program is validated and relevant; all of our full time faculty and most of our adjunct faculty have tested themselves in either competition or practical exams.  We have allowed ourselves to be judged by those in our industry who have the knowledge base and skills, which will push us into a better understanding of the material we instruct.  When our students see us undergoing this type of work, they know our test are a direct reflection of professionals and are not based on subjective whims of their instructors.
The other part of getting prepared for a practical is in writing the recipes, prep list, equipment list and photographing the finished plates.  This piece of the exam is an important part; it will be reviewed by the examiners and also be a part of the planning needed to succeed.  My written work was fluid because each week of practice I would make changes to the plan, or recipes as it evolved.  This part is important because I wanted it to be true reflection of what I was doing during the exam. The prep list was changed as I progressed to assist me in completing tasks efficiently and on time. Even after completing the exam, I know the prep list could have and should have been improved further.  Chefs know the importance of having a complete prep list and depend on writing one that will allow them to complete many tasks at the same time.  The prep list is what choreographs our work into a fine tuned operation.
Due to the campus, where I am employed, being closed for the holidays I needed to pack all of my food and equipment two days before the exam and take it home.  I booked a small hotel room near the testing site and the night before drove up to the city where I was to be tested.  The day before at home, with the help of my wife, I double checked all of my ingredients and finished any last minute prep.  Sara, my wife, was an incredible trooper in all of this, as she assisted me and made sure I had everything on my list.  She spent the entire day with me in our small kitchen and helped to make sure I did not miss any details.  I owe her big time for this! Once I had everything packed and loaded I headed out for my hotel. Did I mention it was minus 12 outside! My truck had been winterized but even in this type of weather you never know what to expect.  Once I arrived at my hotel I unloaded my food into my hotel room. I had four coolers, one for my chickens, one for my fish and two for my mised (click on the link to view the work of “mised produce) produce and dry ingredients. The word “mised” is short for misen place, which means everything in its place.   The hotel room had a small refrigerator that I could use for items I needed to stay fresh and safe. The ice machine in the hotel was also put to use as I made sure all of my ingredients were in the “safe zone” for temperature. I plugged my diesel truck into an outlet nearby and felt confident in my getting to the exam on time the next day.   The next morning I woke up and had breakfast in the hotel. I double checked my prep list, reviewed my recipes and again felt confident.  I went back to my hotel room and packed everything. Before loading my truck I wanted to get it started and warmed up. I went outside clicked to unlock the truck and realized the locks were not working! Okay, I thought, no biggie I will unlock it manually.  I got in turned the key to warm the glow plug, shut it off and did it again (in extreme cold it helps to really heat up the glow plug) and turned the ignition. Nothing happened! The battery could not turn the gelled diesel over! It was at this time I also realized I had swallowed a recently implanted crown in the middle of the night as I slept! My hotel neighbor happened to be in his vehicle and I tapped on his window to see if he could give me a jump. He agreed and we tried but that truck was not going to take a charge! Well by this point I am now frantic and extremely concerned on my next move; after all of the planning and practicing was it now going to come down to winter weather and my truck not starting?  I called the test site, explained what had happened and fortunately they sent someone to see if they could help jump my truck or get me to the test site.  After several attempts to jump the truck I gave up and we packed up the car sent to rescue me, and it took two trips to get everything to the campus of the test site! Plus he drove me to a garage, across from my hotel, and I was able to get them to tow my truck to the garage where they would get it started.  Really! This was not the way I wanted my day to start!
Needless to say I was pretty discombobulated by time I had unloaded all my food and equipment! By time I started to setup I felt a dull throb in my mouth from the swallowed broken crown! This day was not going to be a banner day.  Thankfully I had practiced, planned and prepared for this test! In the end it was not a gold medal performance but I had passed with some minor infractions.  Those infractions still haunt me as I write this but I know that under the circumstances it could have been a lot worse. The reviewers liked my food and liked the fact that I had put a very high level of skill into my food.  At one point in time one of them even joked as I was tourneing potatoes, “…are you glutton for punishment!”
My epiphany on doing this exam opened my eyes to a couple of very important facts; one every chef who takes this exam probably has undergone a tremendous amount of work to be there and two they are very passionate about their work.  As an evaluator it is of the utmost importance to give candidates a meaningful experience that will enhance their work and promote skills. This includes those candidates who do not pass; they too have put in some time or have undergone a great deal to be tested.  Some may not have put in the right amount of practice or their practice was not viewed by someone who could have corrected some key mistakes.  No matter the outcome we need to make sure all candidates walk away with a sense of accomplishment and education that will either assist them to continue to succeed or move to the next level.  What we say during the critique must be educational, non-subjective, and understandable.  Our words are significant to the candidate and everything we state will be deployed later on, either in retesting or in their daily work.  It is imperative we can back our statements with facts that ring true to the candidate and makes sense.  Beyond all of that we need to show an incredible amount of respect to the candidate; we have no idea what brought them to test their skill or what that journey was like to get there. 
The last important fact of taking on a test such as this can best be summoned by understanding the rigor of the test and the importance of wanting to prove to ourselves and those we work with, our commitment to excellence. This excellence is driven by ego, work ethic and the drive to be great at what we do.  No matter the reason, our willingness to sharpen our skills and manage our work is an important component to who we are as chefs.  Chefs are driven to please customers, management and instill a work ethic on our staff because we know we are only as good as our last plate of food.


Featured Post

Eating fresh food from the garden

Fresh foods for me are something of a marvel. The idea of walking out to our garden and picking, pulling or clipping something fresh from ...